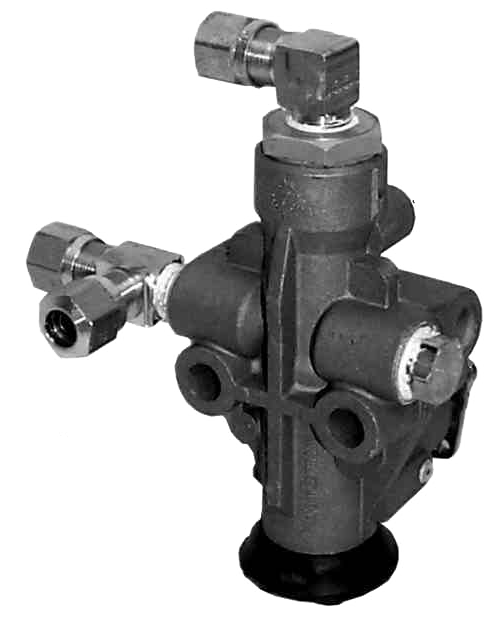
On coaches equipped with mechanical ride height valves, the typical setup is one valve on the front axle and two on the rear axle. The Valve is mounted to the frame and has a small bar connected to the suspension. When the suspension moves up and down the ride height valve's function is to add or dump air from the air bags such that proper ride height is maintained.
The single (1) front ride height valve controls coach “travel mode” leveling from front to back. The two (2) rear ride height valves control “travel mode” leveling from side to side. Rears are more important than front. The valve control rotates between add & dump, with center position being closed to keep air in air bags.
Ride Height Adjustment
The air bags have a quarter inch plate on the top and bottom of each bag. Sort of like a Oreo cookie with the bag being the filling and the plates being the cookie on the top and bottom of the filling.
Place your motor home on as level a slab as you can.
To measure the ride height one must choose one of two measurements.
- Measure from the top of the top plate to the bottom of the bottom plate, which should be 8.5 inches
-OR-
- Measure from the top of the bottom plate (where the bag sits on the plate) to the bottom of the top plate (where the plate sits on the bag), which should be 8 inches.
Adjust the two rear height adjustments first. This should give them the correct height and the side to side measurement should be the same. Then adjust the single ride height for the front.
Exhaust Covers
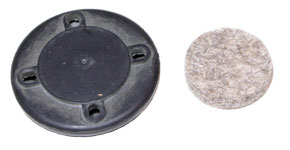
The OEM rubber covers for the ride height valves, deteriorate and fall off over time. Their purpose is to prevent dirt and contamination from entering the breather holes on the valves. They also provide some level of “muffler” to the outlet air. New covers are available for replacement, look for
- Haldex P/N RN10JE - Exhaust Cover Kit
Emergency leveling valve override procedure
If you find you have a leaking Ride Height Valve, you can use the following emergency procedure. Another Emergency Procedure If Your Ride Height Valve Fails
In order to get the coach back to ride height position it may be necessary to follow these steps.
Active Air Leveling System
- Manually raise low side of coach if rear control valve is bad or front of coach if front valve is bad.
- Once coach has been raised to travel height locate Active Air panel on dash.
- Press Stop button on Active Air panel and Coach is ready for travel.
- If all electronics have shut down then you can inflate air bags with Schrader valves located in storage bay to the travel position. Once ride height is achieved then you are set for travel.
HWH 2000 series leveling sys.
- Manually raise low corner of coach (attempting to locate center of air bag travel)
- Locate HWH control boxes in storage bays (frt. & rear air boards)
- Once boards have been located we will need to identify the brown 12 pin plug on front air board (if control valve is bad on the front)
- If coach is leaning to the left or right on the rear locate rear control board identify the 12 pin brown (in some cases may be black)
- Disconnect plug for the corresponding control box to valve that is failing
HWH 680 series leveling sys.
- Manually raise low side of coach if rear control valve is bad or front of coach if front valve is bad
- Locate HWH control box remove cover
- There is a series of circuit boards located inside of box (top and bottom boards) you will need to locate the 7.5 amp travel fuse and remove. (lower board)
- The coach will now hold to the level position you manually set
HWH 600 series leveling sys.
- Follow same procedures as on 680 series above.
- The only difference is the control box layout, there is only a single row of fuses locate the 7.5 amp fuse and remove.