Table of Contents
Brake Maintenance
Just recently at the Albuquerque Fun Rally. I discovered that my left rear brake was worn beyond the limits and required changing on the road. Yes. we do know how you feel when this happens. I am going to attempt to give you some information from the Rockwell Maintenance manual without rewriting the whole book. This is basic information to give each of you some insight on what is involved in maintaining our brakes in good operating order. For the do-it-yourselfers. you need to order the manual so you will have all the information needed to maintain your brakes yourself.
Lubrication, Preventive Maintenance, and Troubleshooting
Preventive Maintenance
Note: the maintenance schedules shown in the manual are for normal operating conditions.
- Operation under severe conditions can require shorter periods between maintenance.
- Operation over long periods with few stops can permit longer periods between maintenance.
Inspection Schedules
Note: It is recommended all services mentioned here be performed by a qualified technician familiar with Meritor air disc brakes.
Inspect and lubricate the caliper and the slack adjuster according to one of the following schedules. Use the schedule that gives the most frequent inspection and lubrication.
- The schedule for chassis lubrication used by your fleet.
- The schedule for chassis lubrication recommended by the manufacturer of the chassis.
- At least 4 times during the life of the linings or every six months.
Brake Inspection
- Put blocks in front of and behind the wheels to prevent the the vehicle from moving.
- If the vehicle has spring brakes, manually compress and lock the springs to release the brakes.
- Use the correct slack adjuster template for your brakes.
- Check the in-service free stroke and the adjusted chamber stroke.
- Check tor excessive movement between the slack adjuster and the powershaft. If necessary, remove the slack adjuster. Replace a powershaft or slack adjuster gear that is damaged or worn.
- Check for contamination on the slide pins.
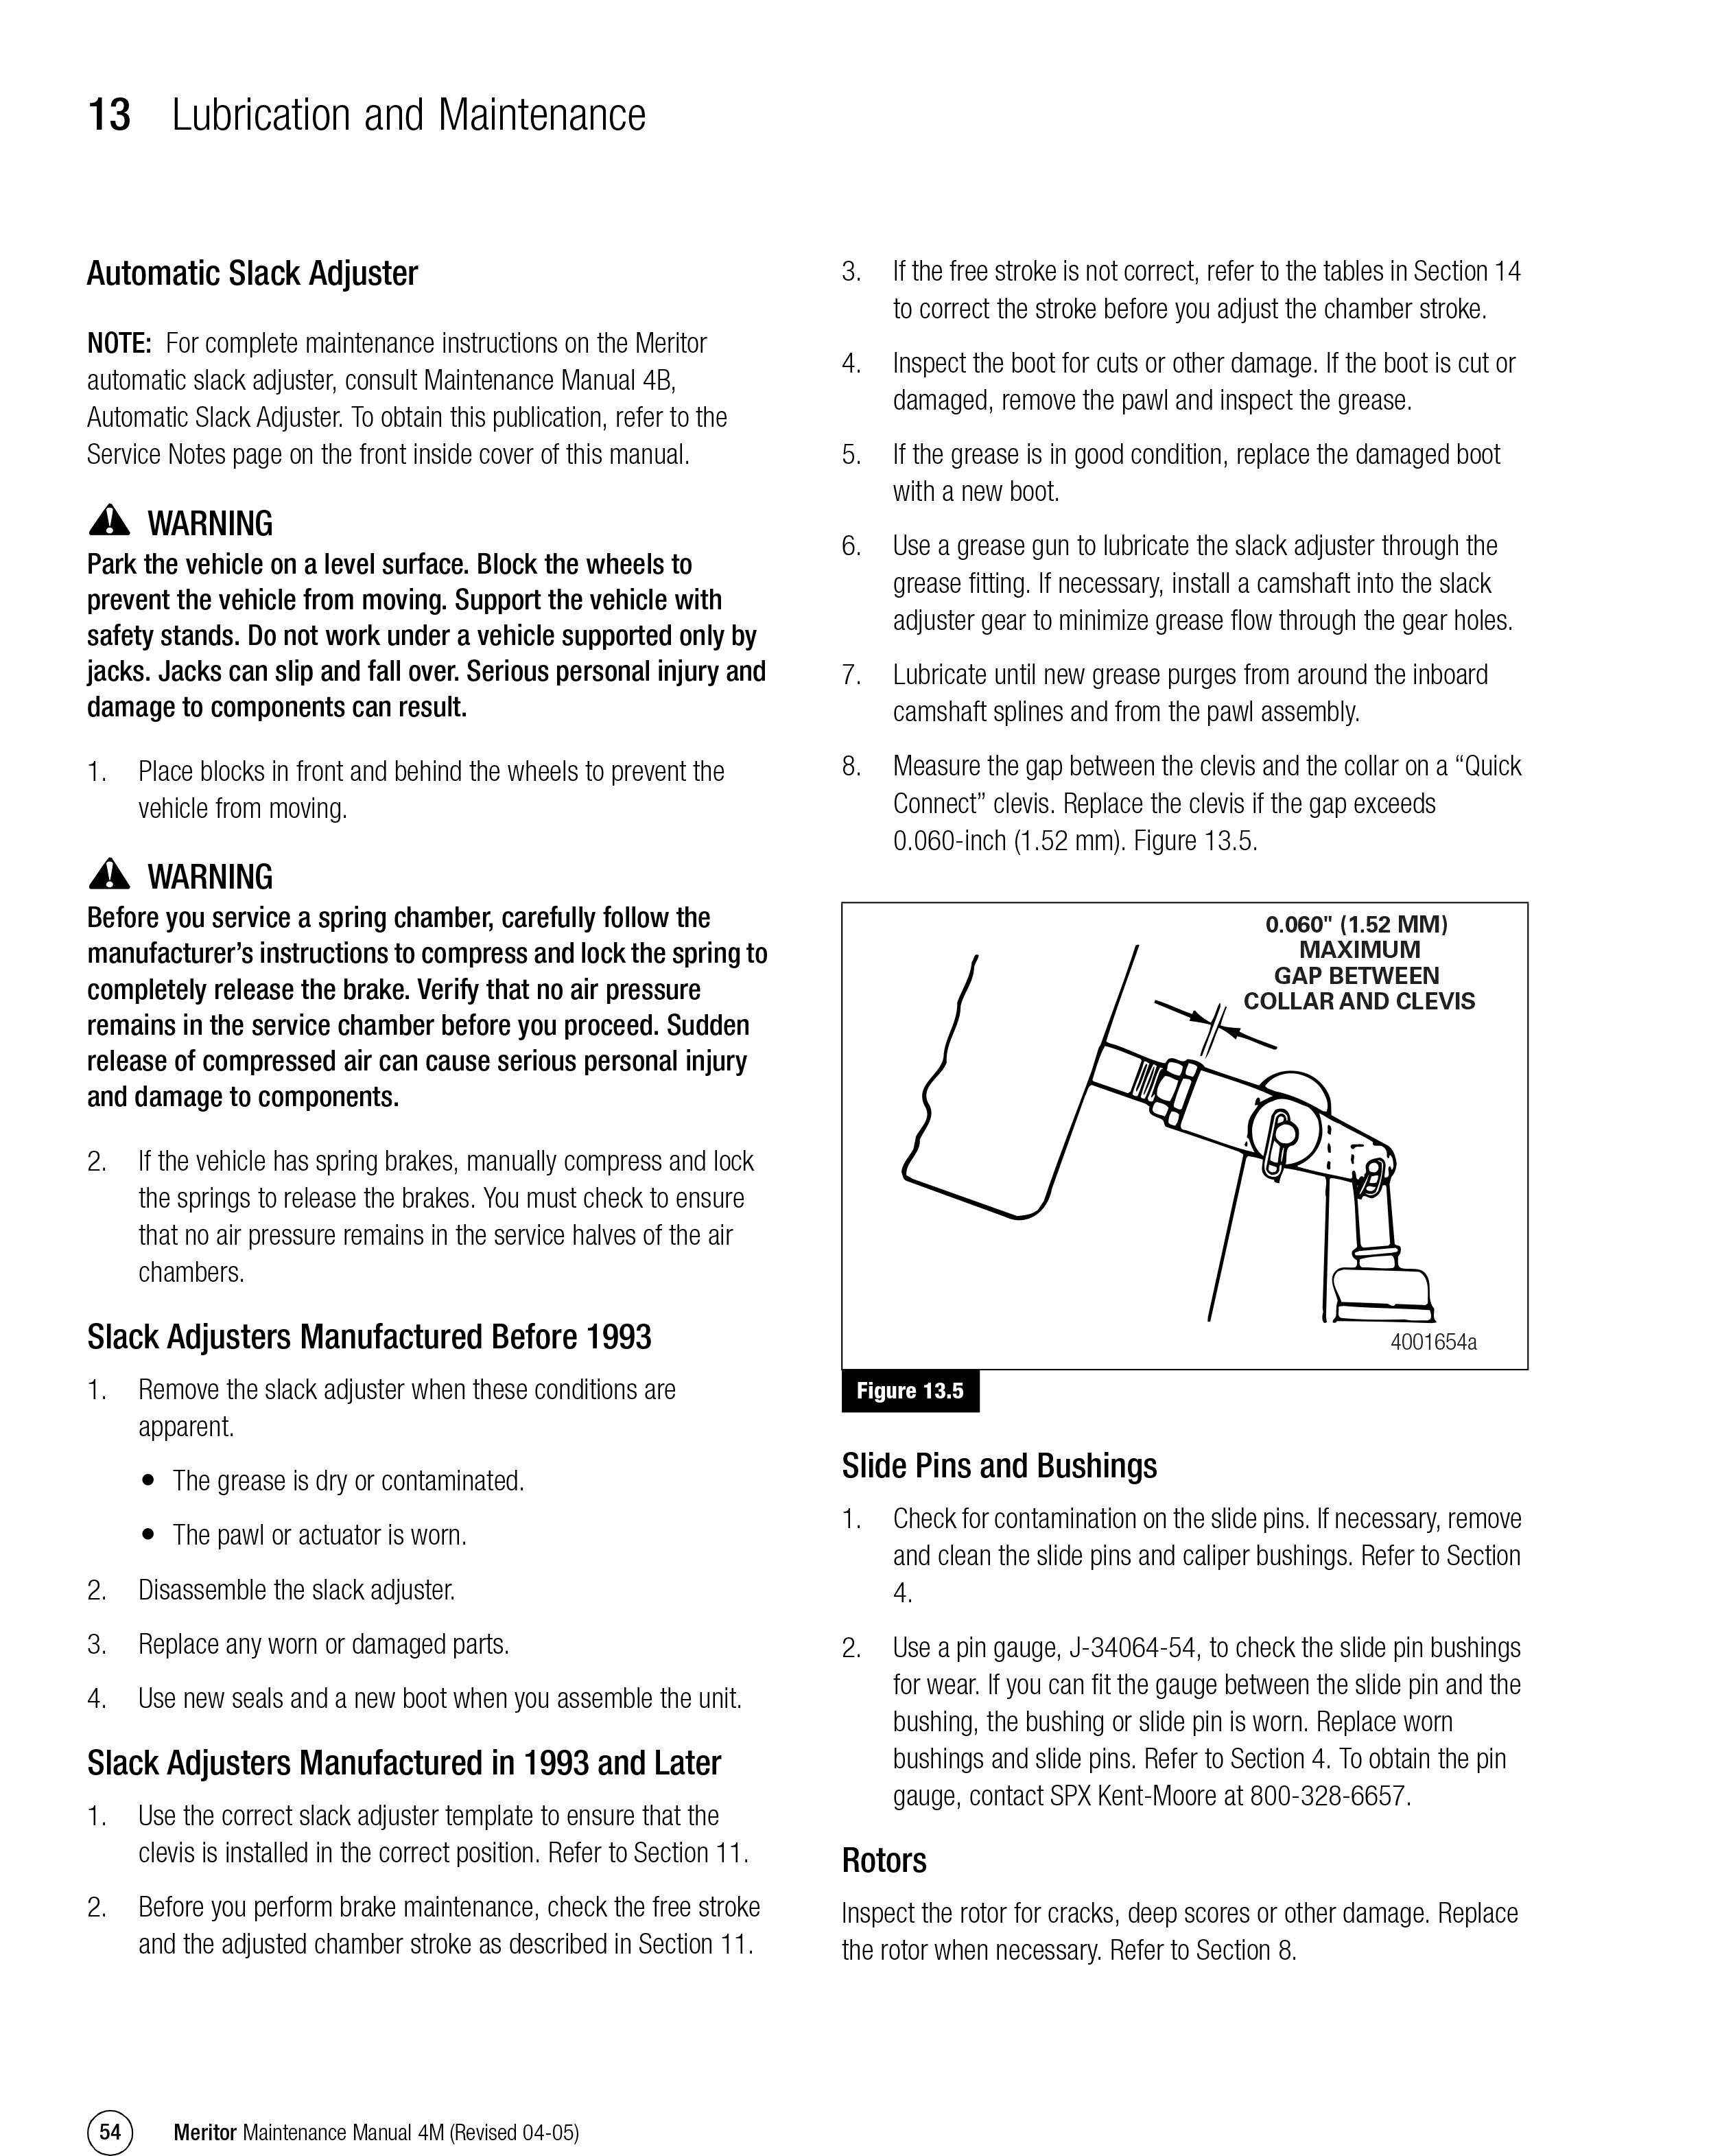
- Use a pin gauge (j-34064-54) to check the slide pins bushings for wear. When the linings wear, the caliper slides in along the pins. To check for lining wear, check the position of the inboard bosses of the caliper on the slide pins. The figure below shows what to look for to check for lining Wear.
- If the bosses are within 1/4 inch of the ends of the pins, remove the wheels and inspect the linings. If the bosses are within 1/8 inch of the ends of the pins, replace the linings.
- Move the air chamber from side to side to check that the caliper moves freely on the slide pins. When the caliper does not move freely, inspect the slide pins, slide pin bushings, the slide pin retainers for wear or damage.
- Inspect the rotor for cracks, deep scores,or other damage. Replace when necessary.
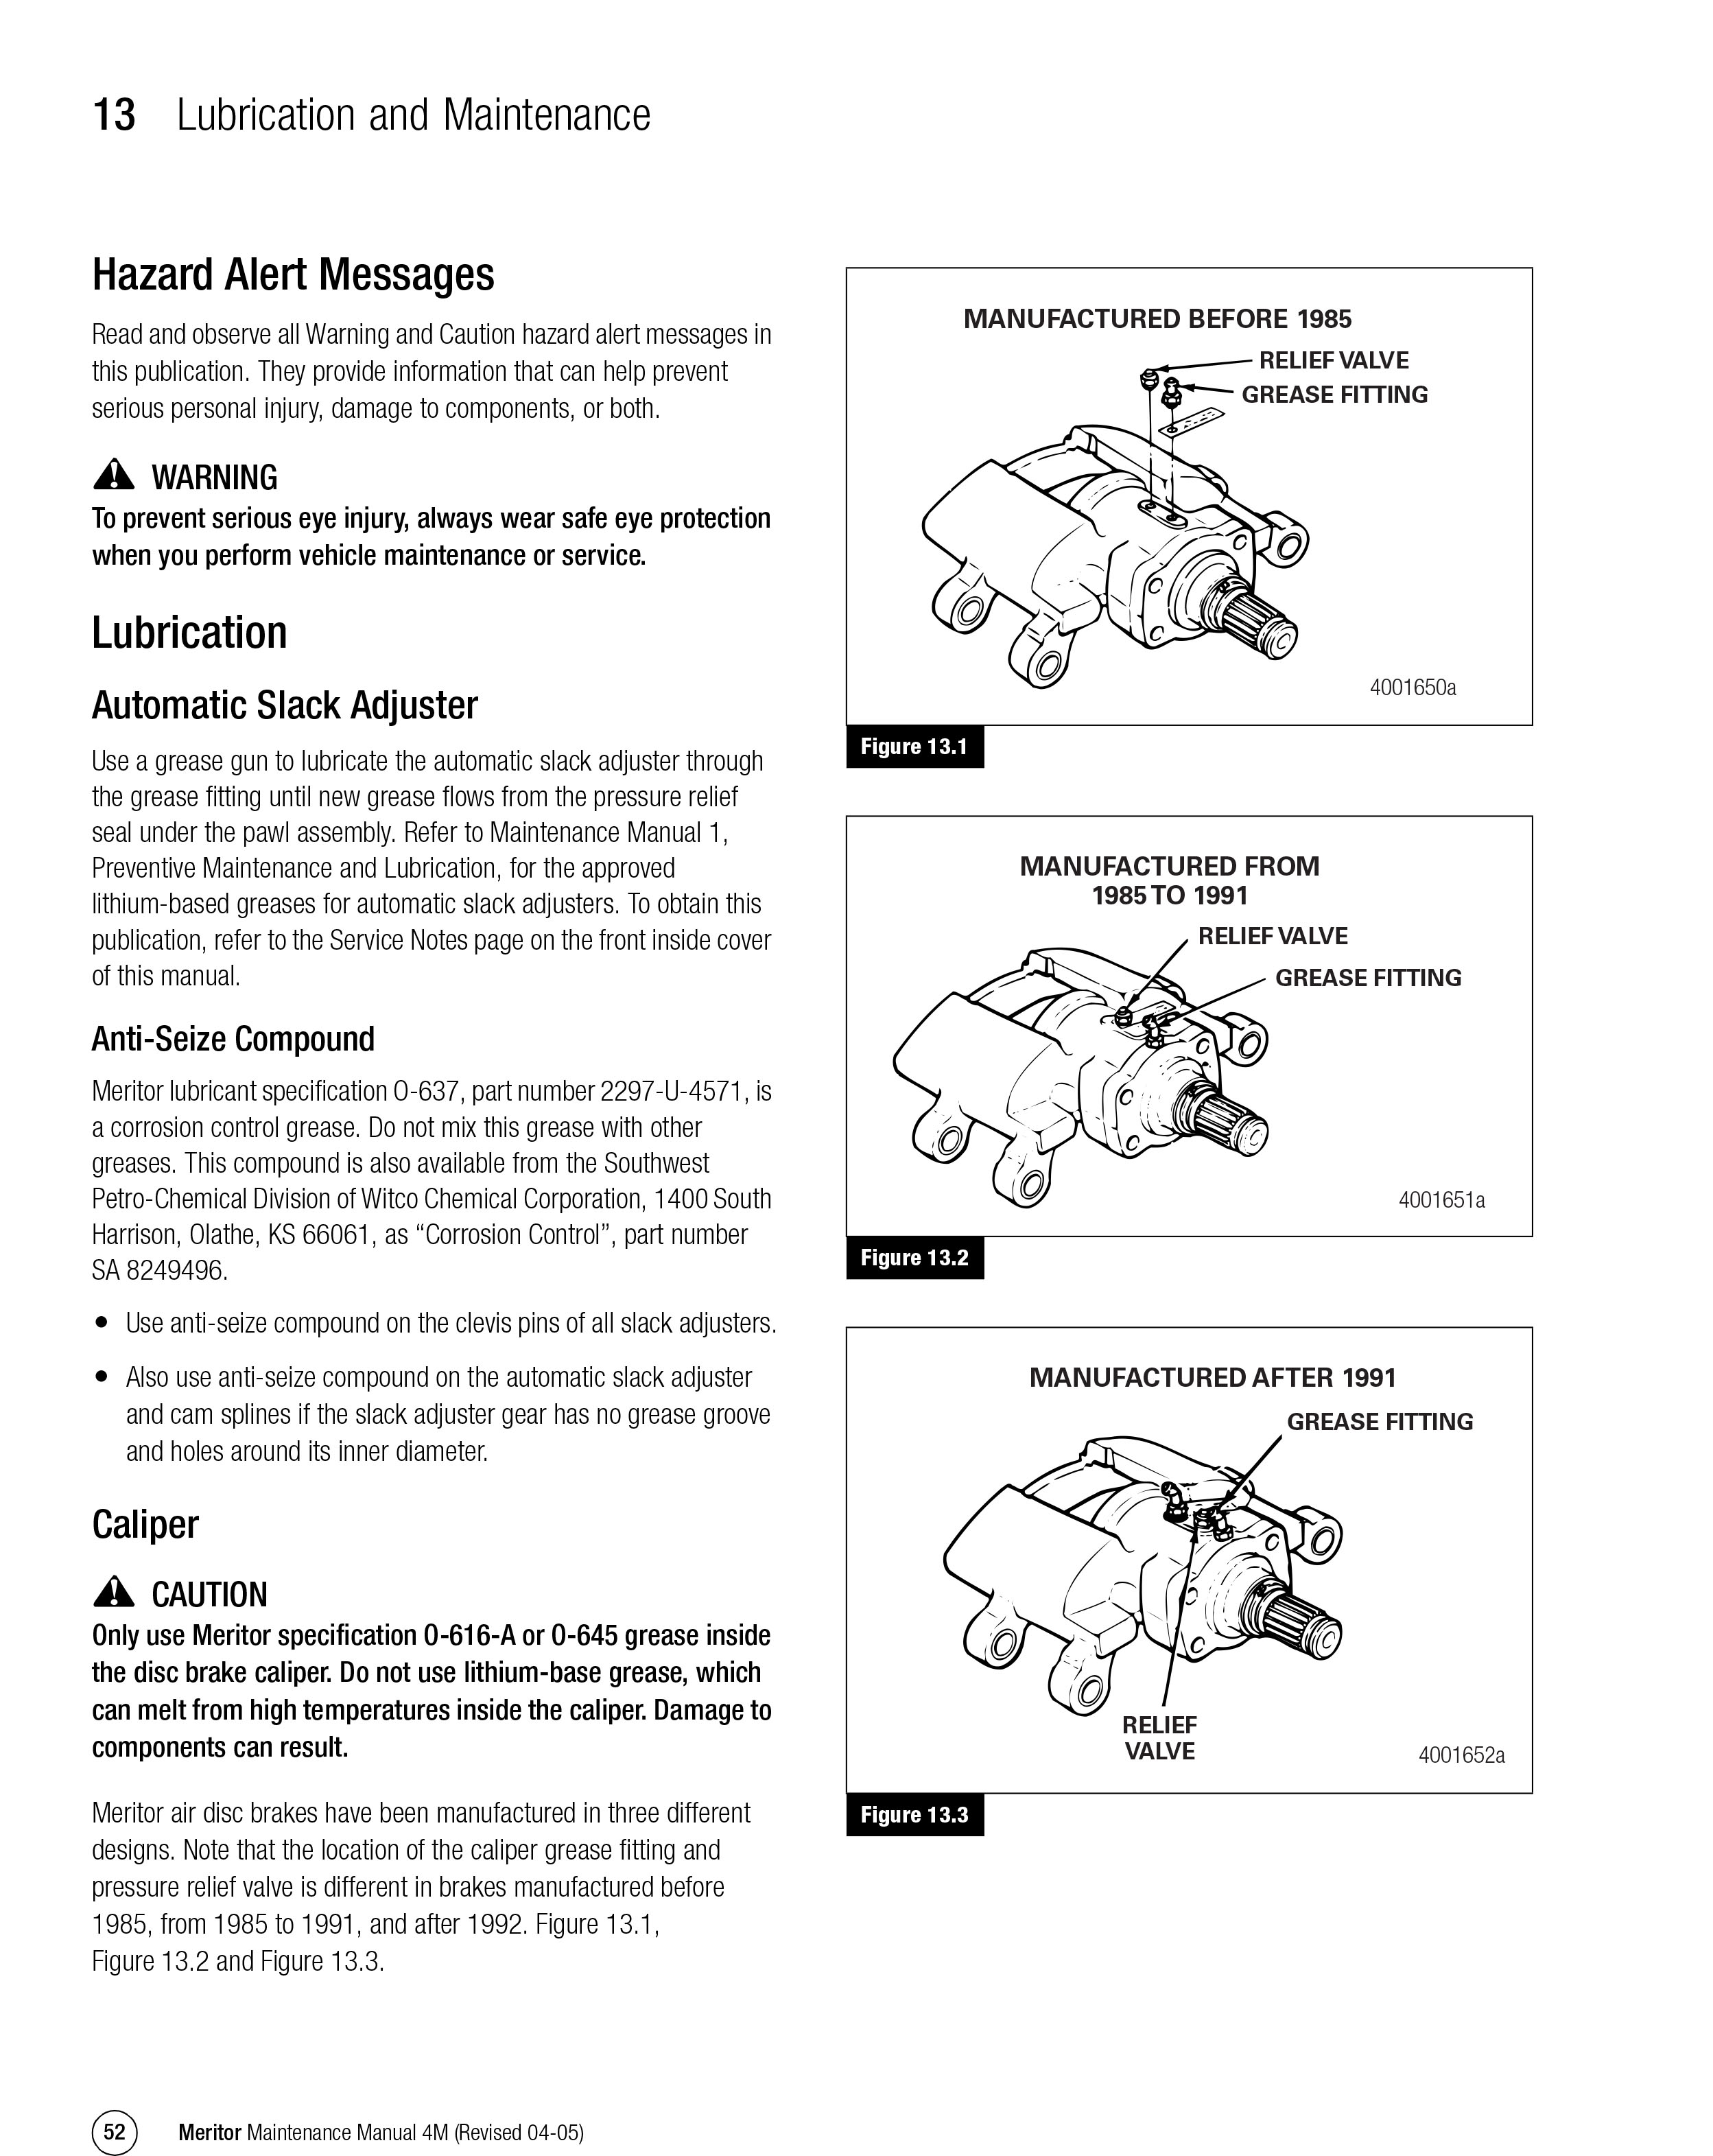
Lubricating the: Automatic Slack Adjuster
Use grease gun to lubricate automatic slack adjuster through the grease fitting until new grease flows from the pressure relief seal under the pawl assembly.
Lubricating the Caliper
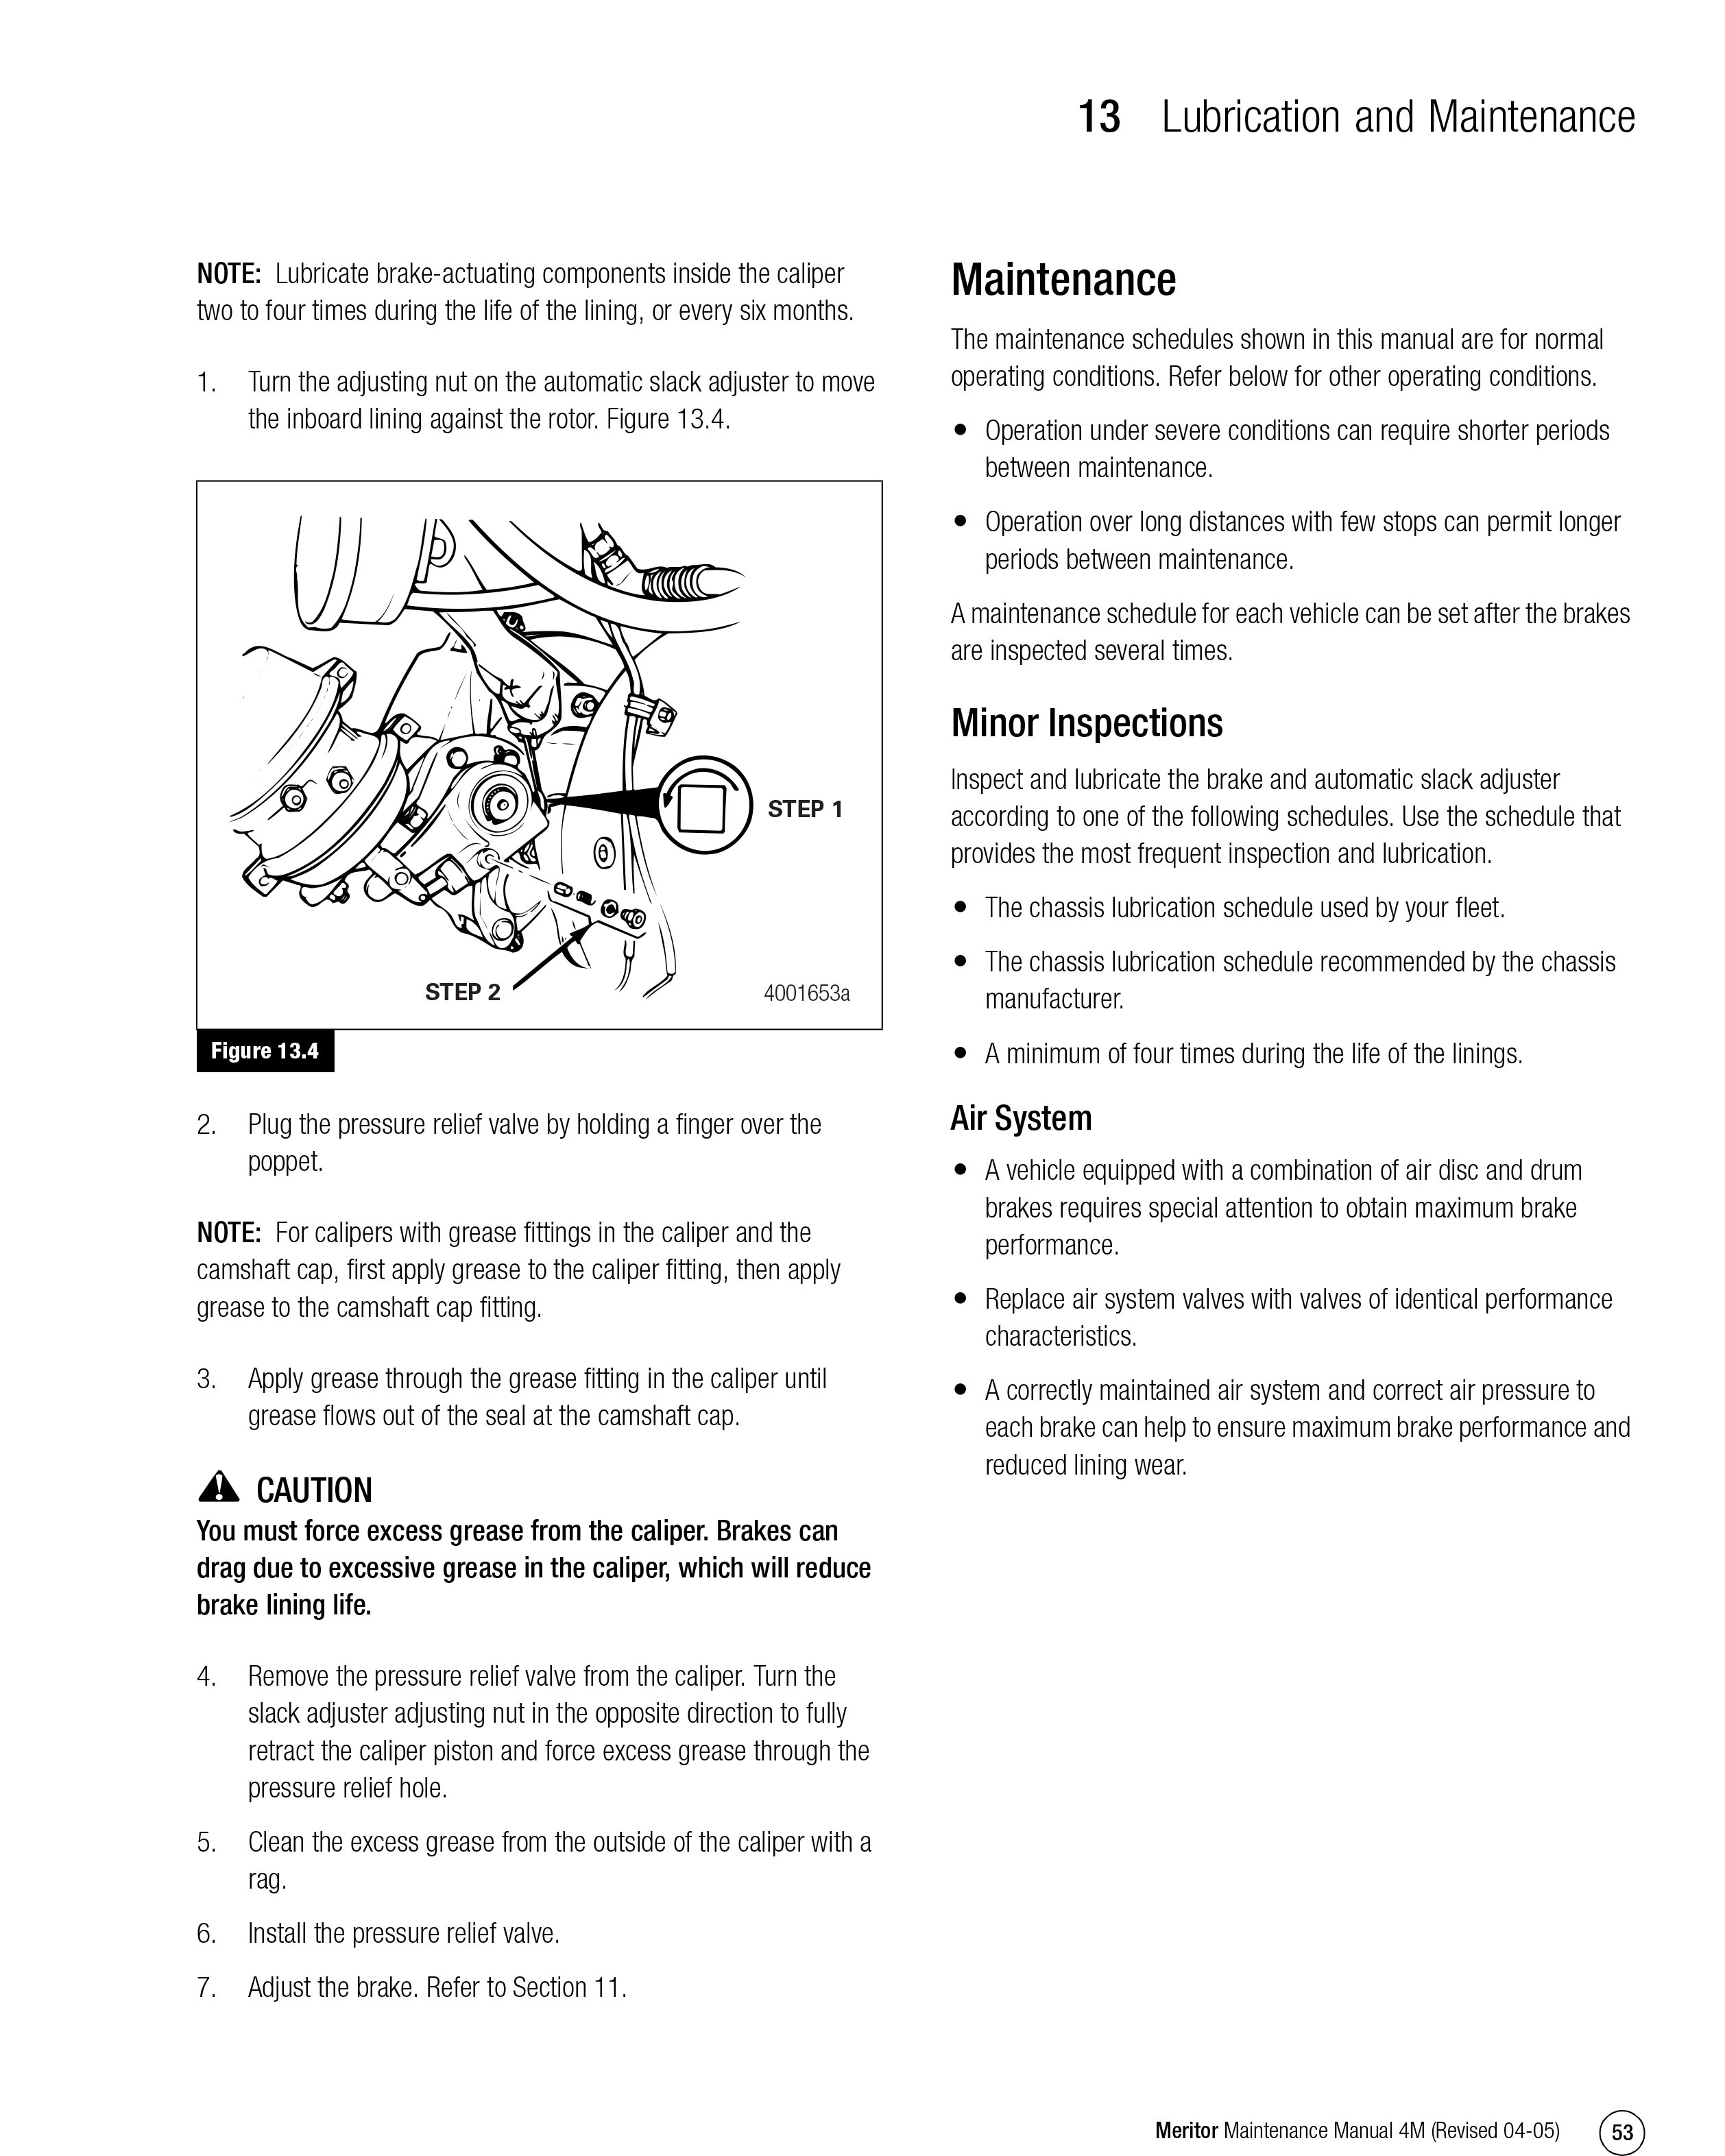
- Turn the adjusting nut of the slack adjuster to move the inboard lining against the rotor.
- Plug the pressure relief valve by holding a finger over the poppet. CAUTION: You must force excess grease from the caliper. Brakes can drag from too much grease in the caliper, which will reduce brake lining life.
- Apply grease through the grease fittings in the caliper until grease flows out of the seal at the powershaft cap.
- Remove the pressure relief cap from the caliper. Turn the slack adjuster adjusting nut in the opposite direction to fully retract the caliper piston and force excess grease through the pressure relief hole.
- Clean excess grease from outside the caliper with a rag.
- Install the pressure relief valve.
- Adjust the brake.
- Install or re-engage the brake on the automatic slack adjuster.
Clean, inspect, and measure the slide pins and bushings
- Clean the slide pins. Remove any paint or other material from the pin. Replace the pin if you find burrs, nicks, corrosion, or Other damage.
- Measure the diameter of the pin with a micrometer. Replace the pin if the diameter is less than 0.987 inch.
- Clean, inspect and measure the bushing in the caliper.
- Repeat this procedure for the lower pin and bushings after you install the new linings and reinstall the caliper.
I recommend that you document the pin measurement every time you have your brakes inspected. This will give you a baseline measurement of the pins and will allow you to see if anything starts to change between inspections.
As You can see there is a lot to do when maintaining your brake in good operating order. I only took some of the highlights from the manual to give you enough information to understand what is involved in maintaining the brake system and some knowledge for You when You have your brakes inspected by your local service dealer. I hope this will help in maintaining your coach before it's to late and damage is done costing you lots of money that could have been prevented.
Here is the lubrication section from the maintenance manual in PDF format lubrication_and_maintenance.pdf as well as the individual pages as images.