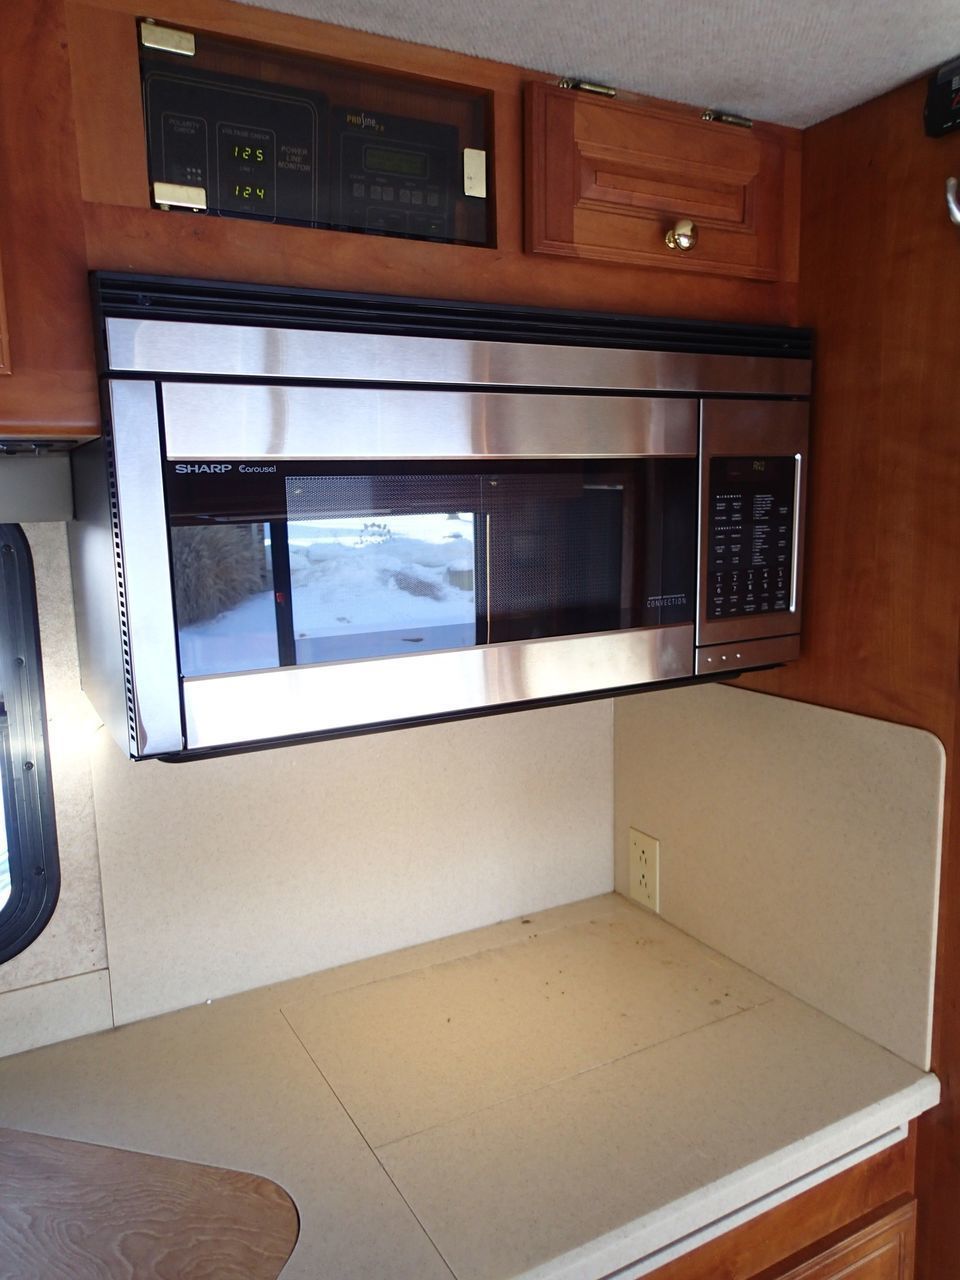
Replacing original Sharp microwave model with a new Sharp model
Sharp R-1850 Replaced with a model R-1874
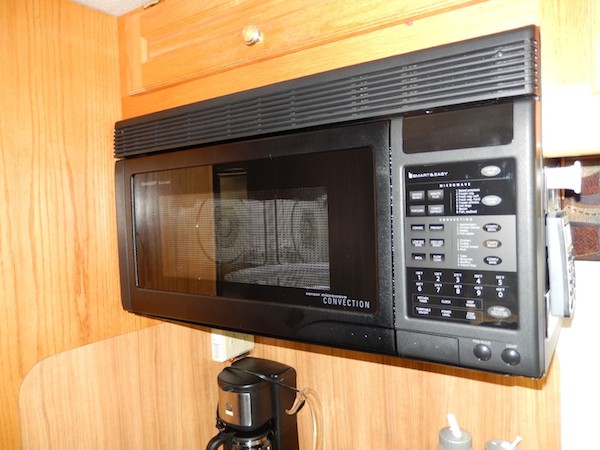
Just finished replacing my original Sharp R-1850 with a Sharp R-1874 microwave. It is a direct replacement for the original but I did do a little fiddling.
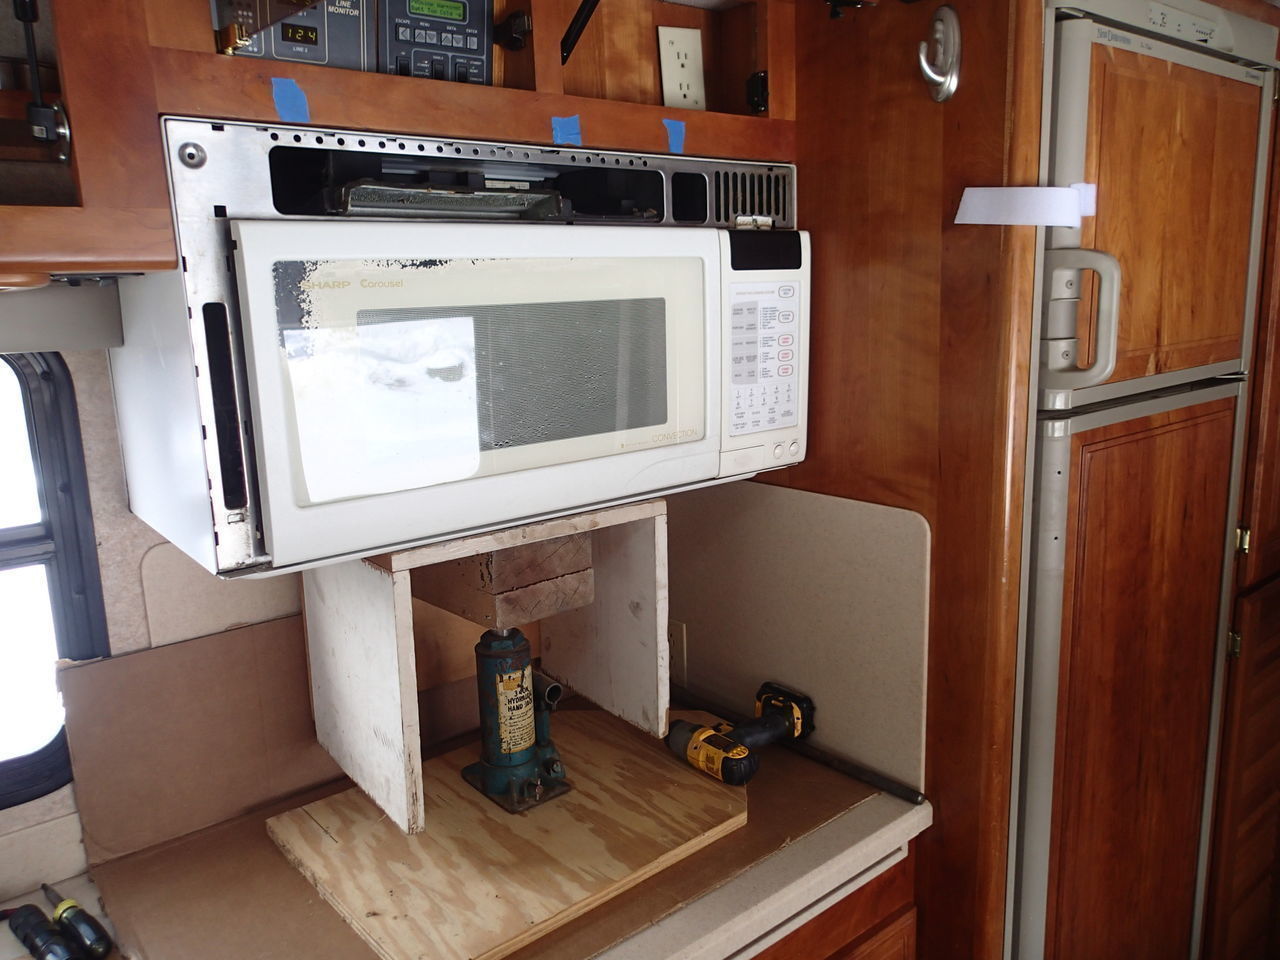
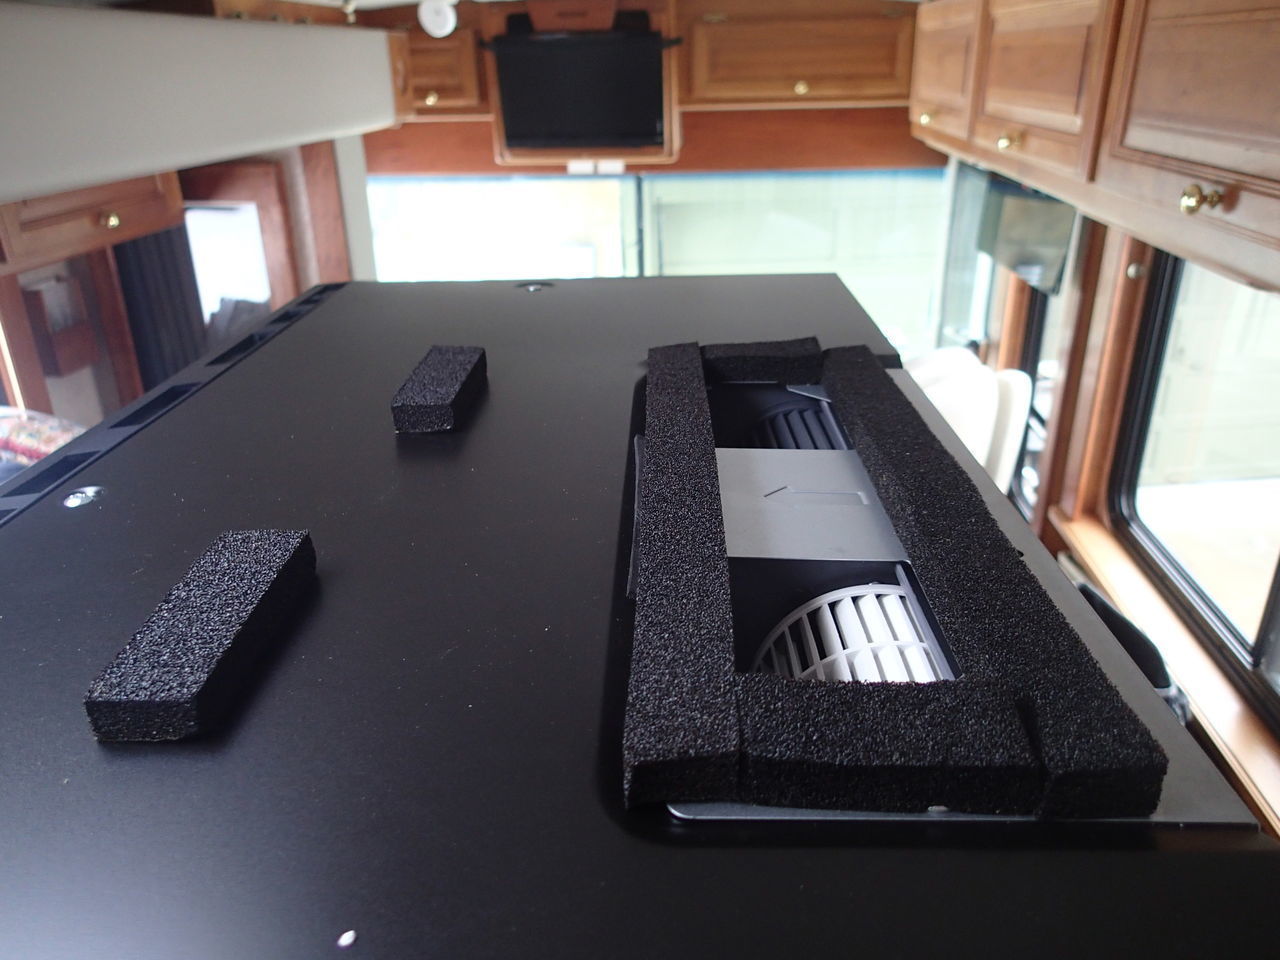
First step was remove the old microwave. As previously noted, the toughest part is finding the extra screws FOT used on the install and also the weight of the microwave. I found 2 screws installed in the face frame of the cabinet above the microwave (installed by FOT) and two long screws that go diagonally up from the bottom vent openings into the wall bracket. When I could not budge the microwave, 5 minutes of additional searching found a third screw in the upper face frame. Picture 1 shows the places I found the screws marked with blue tape. You have to remove the top grill to see them.
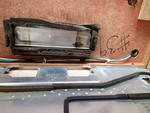
It also shows the lift I used to move the old microwave out and the new one in. The jack allows very easy and precise vertical positioning. The cabinets keep the unit from tipping side-to-side and one hand easily holds the microwave in position from front to back. It also slides easily on the cardboard put down to protect the countertop. Picture 2 shows how the screws were hidden in the upper face of the microwave.
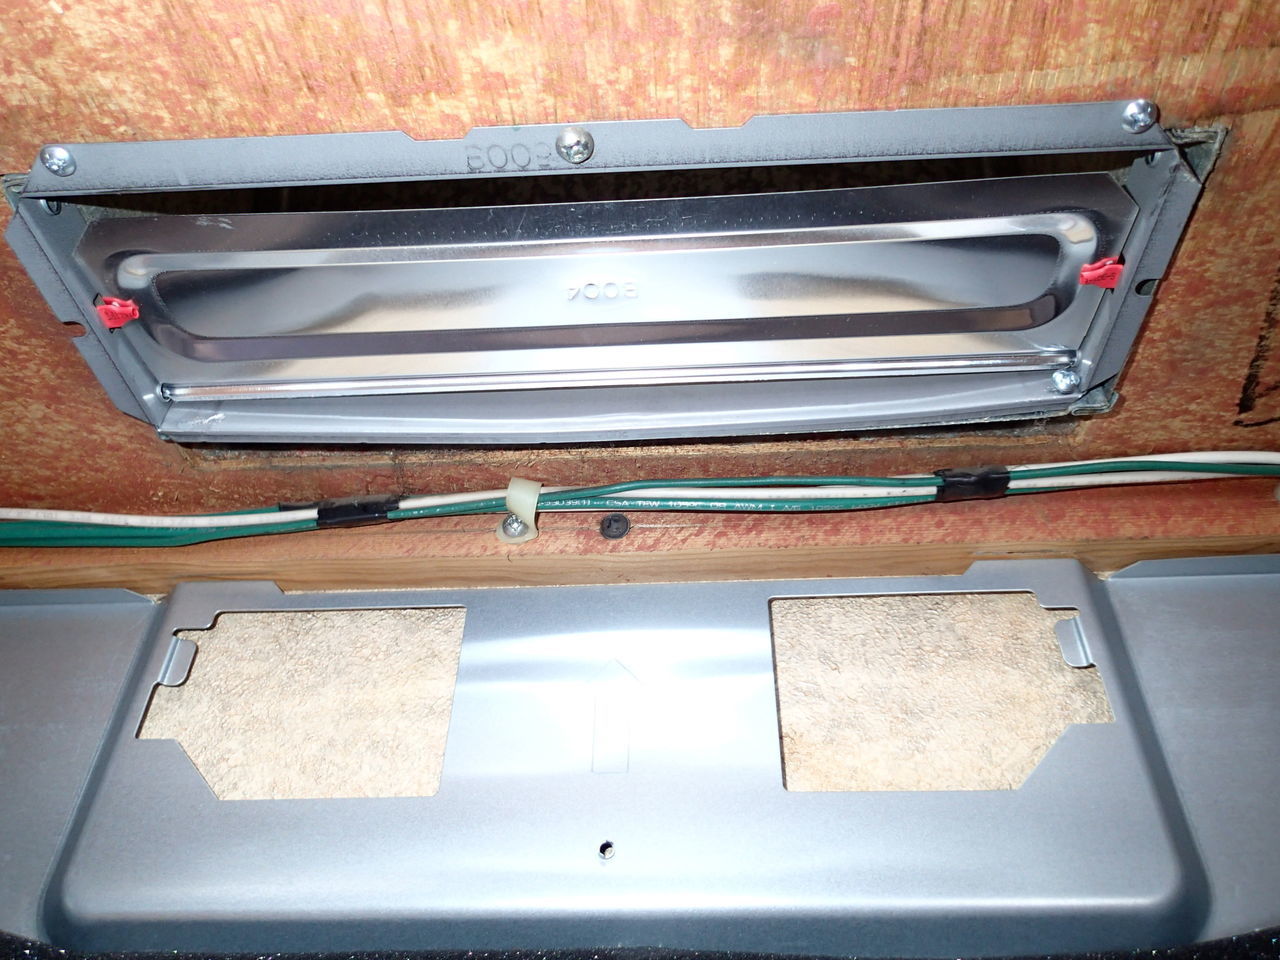
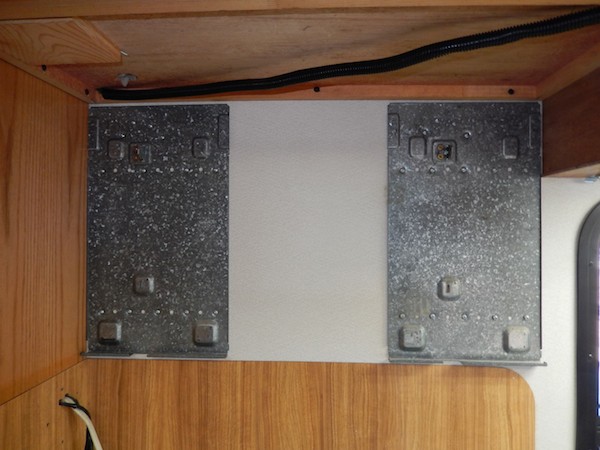
The next picture shows the old and new mounting brackets. They are identical. I replaced the old one to take advantage of the new weatherstripping.
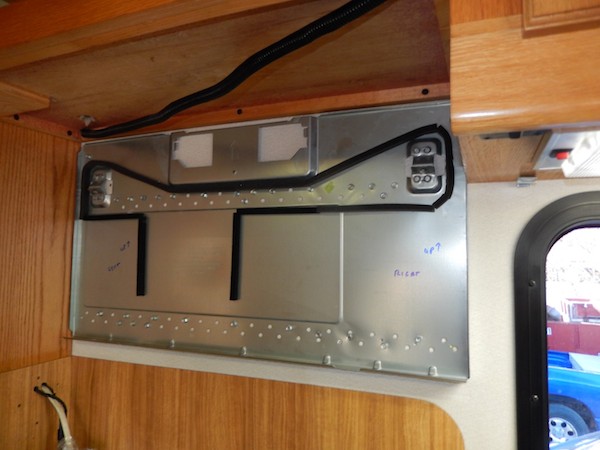
The microwave comes with a new vent damper to replace the old one. The instructions say to mount it on the top of the microwave, but FOT originally mounted it on the vent opening under the cabinet. The existing weatherstripping was shot so it required a trip to Lowes.
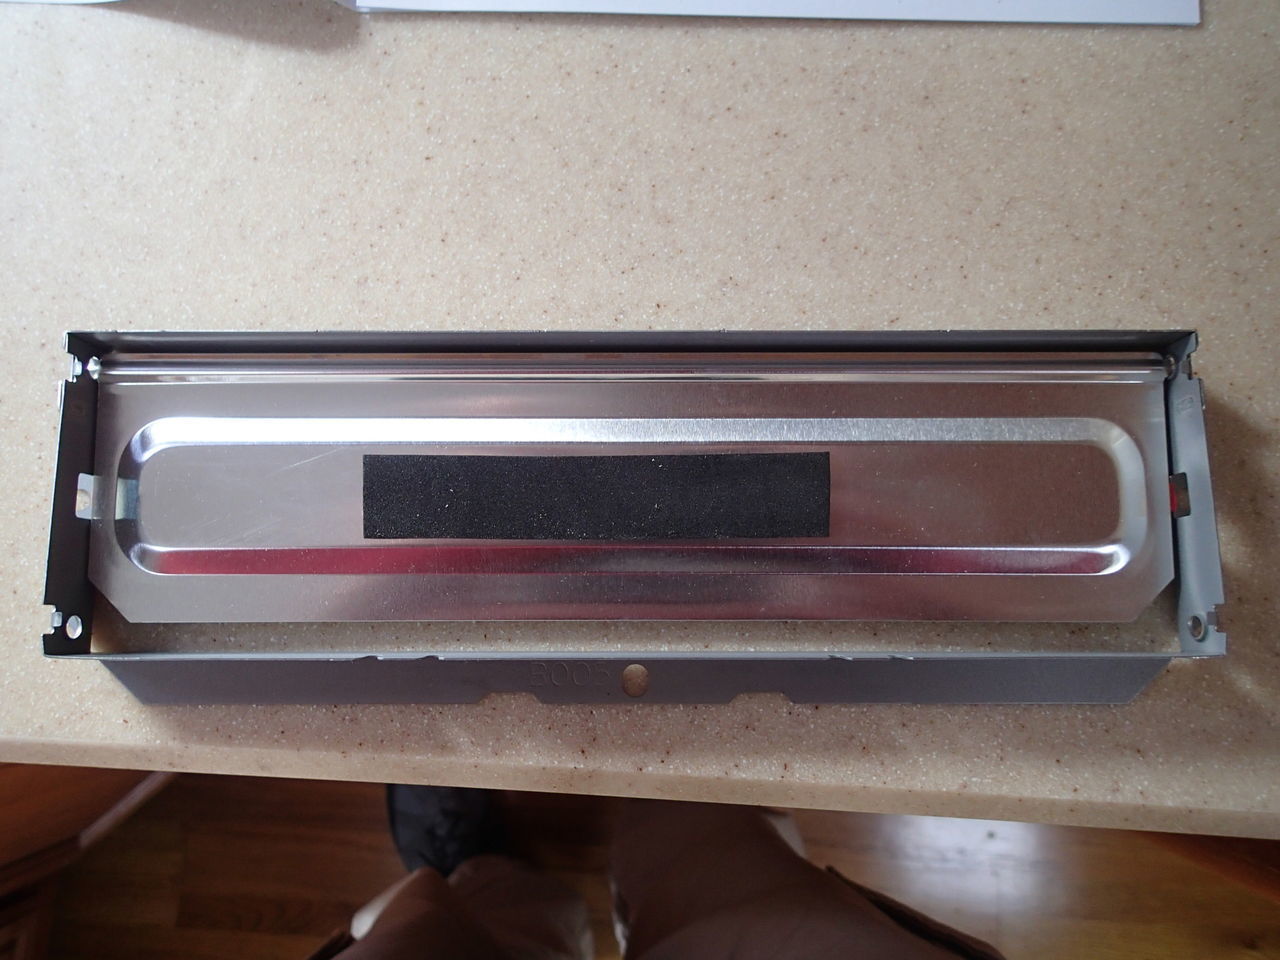

The old and new vent locations in the top of microwave were identical. I did have to follow the instructions on the new one to set it up for top venting.
The old damper was very noisy when it was windy or we were driving, so I tried to make the new one a little quieter. I added a very light, thin piece if 1“x1/8” weatherstripping to the body and also put some heat shrink on the two prongs that the damper bumps on when closed. The 1/8“ weatherstripping was left over from redoing the stripping on the PTL front screen door.
I mounted the damper under the cabinet, like FOT did. It required 3 additional #6/3/4” screws to help quiet the rattle.
Next, I added the weatherstripping for the vent. FOT attached it to the vent under the cabinet, I chose to attach it to the top of the microwave. I added a couple of extra pieces to the top of the microwave to keep it from making any noise while driving. I found the weatherstripping at Lowes.
The 120V cord coming out of the top of the microwave seemed stiffer and it stuck up more than the original so I cut a hole in the bottom of the cabinet to give it a little more room.
The install was pretty straight forward. Slide it into place. Jack it up. Tip the back edge up and secure it in the bottom of the wall bracket. Tip the top back and tighten the long diagonal screws.
These screws are easy to pop out and remove from the microwave. A forum member has previously posted that the new screws are much more cheaply made that the originals. I suggest (like he did) that you salvage the old screws and use them. I stripped one of the new ones before switching to the old ones.
Also, the design of the top, front of the microwave has changed so it is not possible to install the extra, hidden screws in the top face frame. This is because the top grill is now held on by 2 screws on either end of the face and 1 screw that comes down through the top of the microwave, You have to unmount the microwave to remove this screw. I guess it would be possible to leave the top screw out. You could then probably remove the grill after you install the microwave. This would allow you to add the additional screws to the face frame.
I decided to add a few more screws to back bracket to beef it up. So at Lowes, I got #8×3/4“ screws and added 4 more to the top row of screws on the bracket. Picture 2. Same style I used for the vent, just a different size.
I also removed the aftermarket LED bulbs from under the old microwave and installed them in the new one.
Overall, we are very happy although we still need to take it on a trip and put it to the test.
Sharp R-1830B Replaced with a model R-1875-T

We replaced our original Sharp 1996 convection microwave model R-1830B with a new Sharp convection microwave model # R1875-T
Remove original microwave by removing back bottom small “locking” bolts with round plastic trim around screw head. These bolts keep the wall-mount latch from accidental release. After lock bolt removal, pulling down two back bottom levers will release rear wall mount latch, allowing microwave to tip forward and be removed by lifting off the wall mount.
Foretravel usually installs a couple of ‘safety’ screws through the front top case. Remove plastic top microwave vent, remove any wood screws, manually hold microwave to wall, pull two levers down a couple of inches, tip microwave forward, pull power cord through shelf above microwave and with four hands lift 60 pound+ microwave off wall mount bottom edge.
Original wall mount was in two steel pieces and held in place with dozens of screws.
New wall mount is easier to install as it is all one-piece. We tried to reuse original screw holes, but decided on drilling dozens of new holes in two horizontal rows. New wall mount is positioned with about 1/8” between top of wall mount and bottom of cabinet.
It seems that Foretravel has two horizontal metal supports in the wall to which microwave wall bracket can be fastened. New wall mount bottom edge still carries ALL of the weight, but now uses two very long bolts that angle up from mid bottom to top rear that are fastened to wall mount bracket. Drilling a couple of holes in case forward top for ‘safety’ wood screws is a good idea. New plastic vent is now screwed in place, but has a center tab that we had to remove.
Protecting side wall and stove top is a good idea as microwave is very heavy and awkward to lift and lower. New Sharp oven still has inset hinge, available in black and push-button door opener, which makes a good fit and finish. Almost all other brands have edge hinges and large pull handles and many have chrome / white finish. Edge hinges and pull handle can prevent door from fully opening.