Repairing / Cleaning the Retarder Valve
After looking around I couldn't find a post on someone disassembling the old style Allison retarder air valve to clean out a dirt/mud dauber nest. For those that don't know the air valve exhaust has no protection to keep the daubers out. There are several pics. of this valve exhaust fitting already here on the site where some have found the fitting and nothing connected to it. All you need is to take a piece of screen wire and a ty wrap to make a cover that goes over the exhaust fitting. Make sure to make the cover ping pong ball size to keep from restricting the air flow. Here is a brief write up of what you will be tackling.
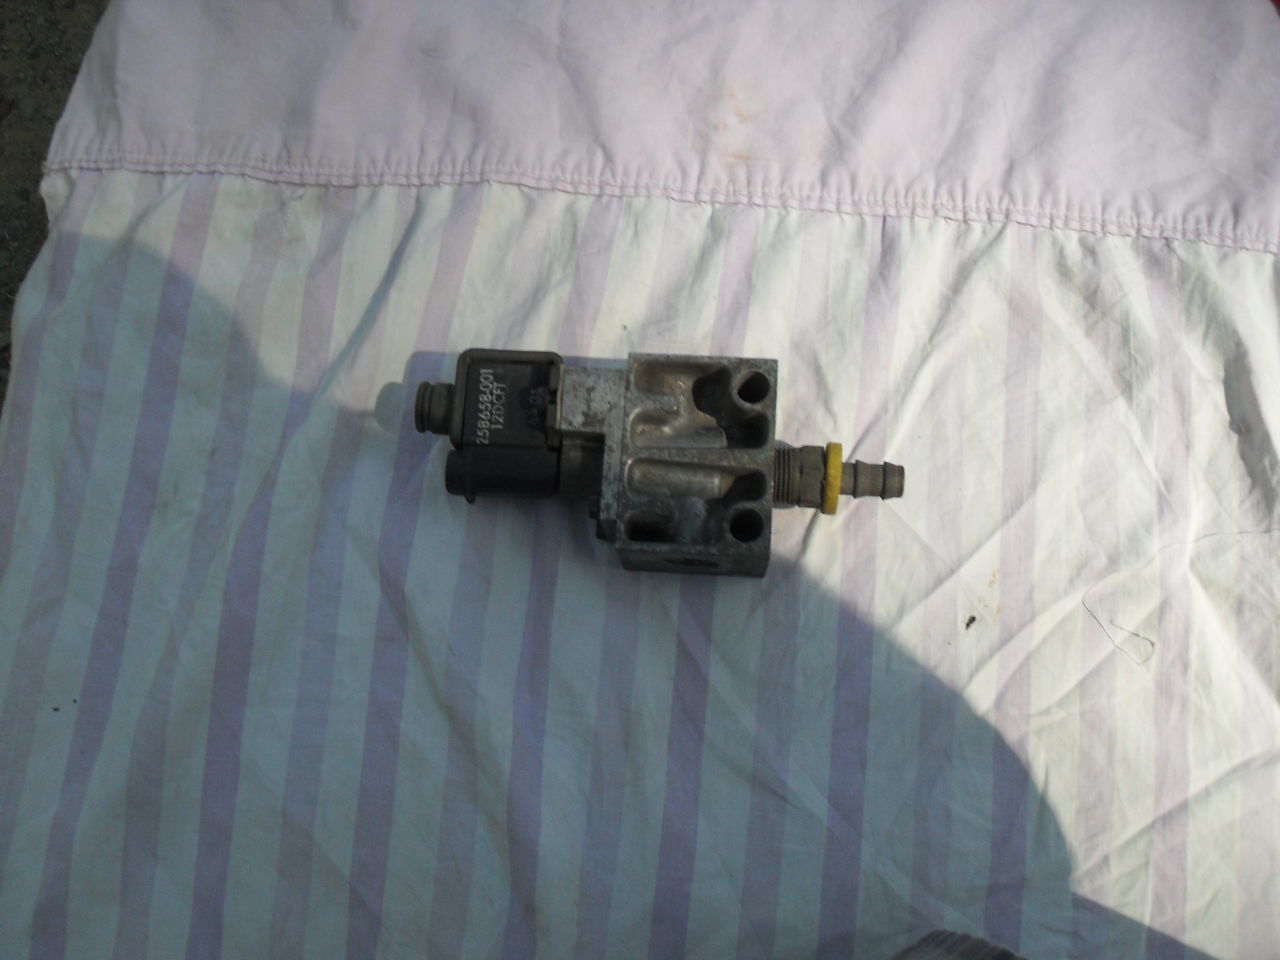
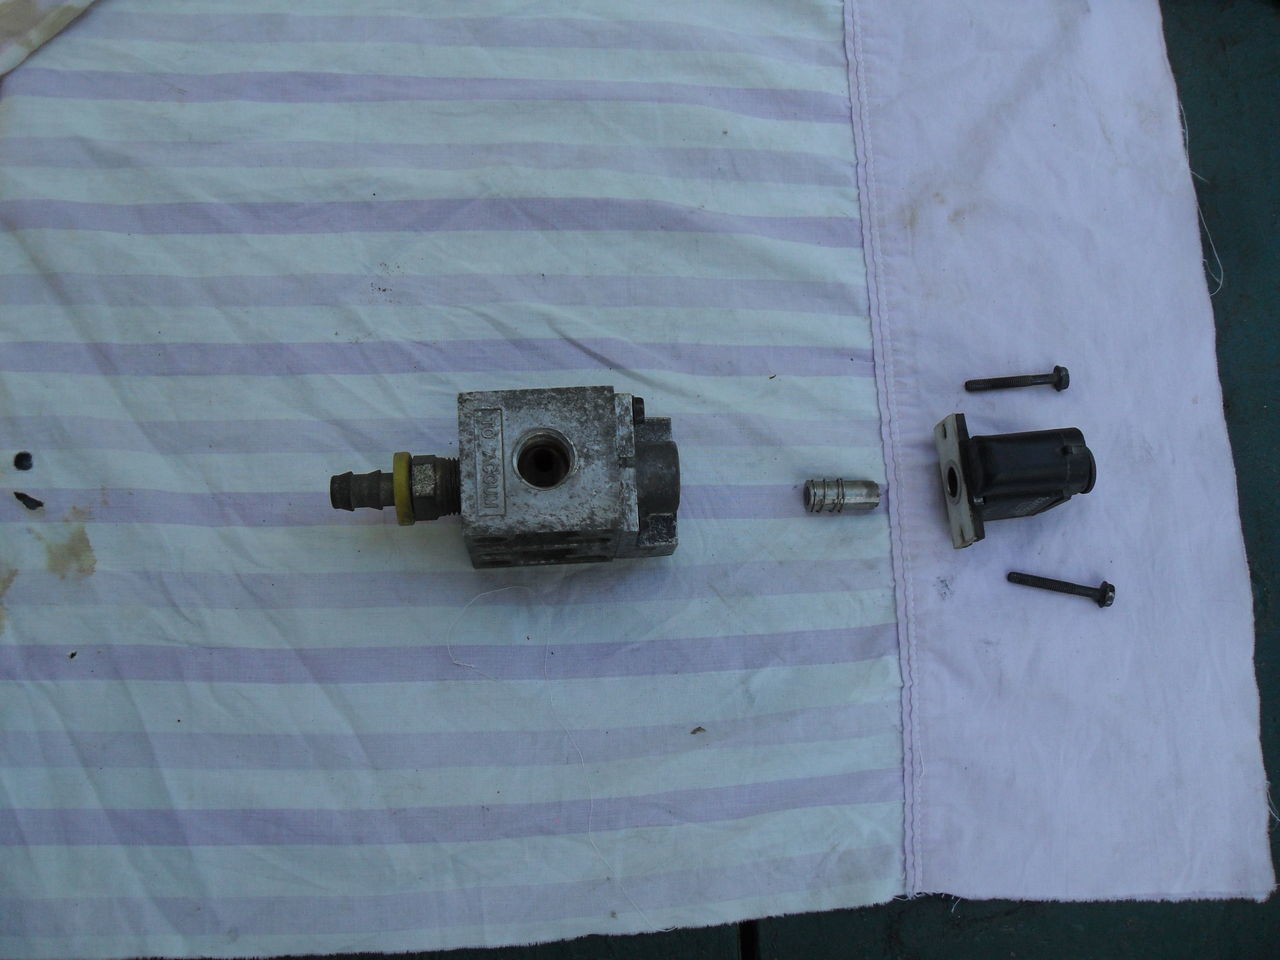

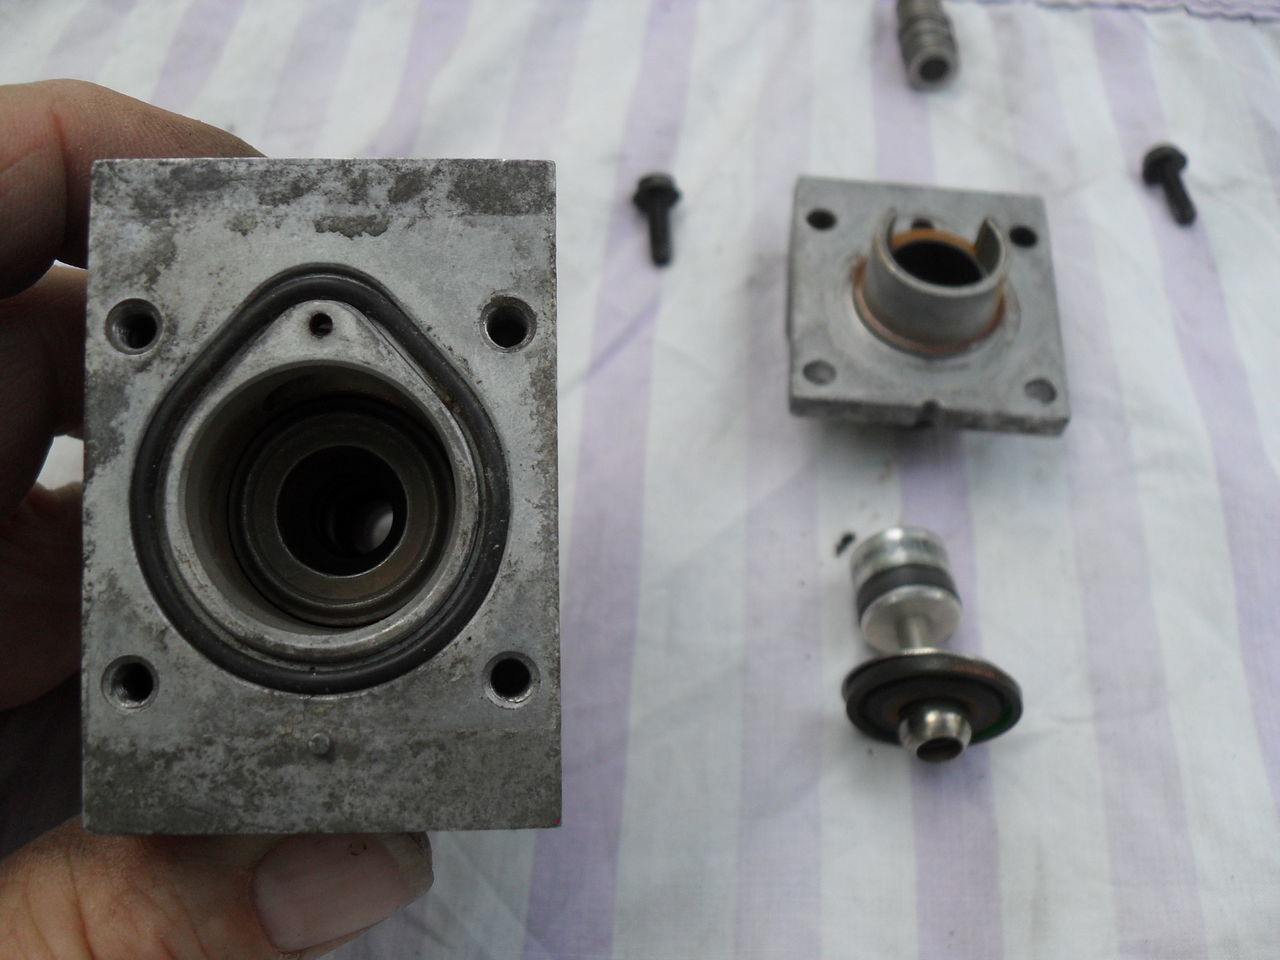

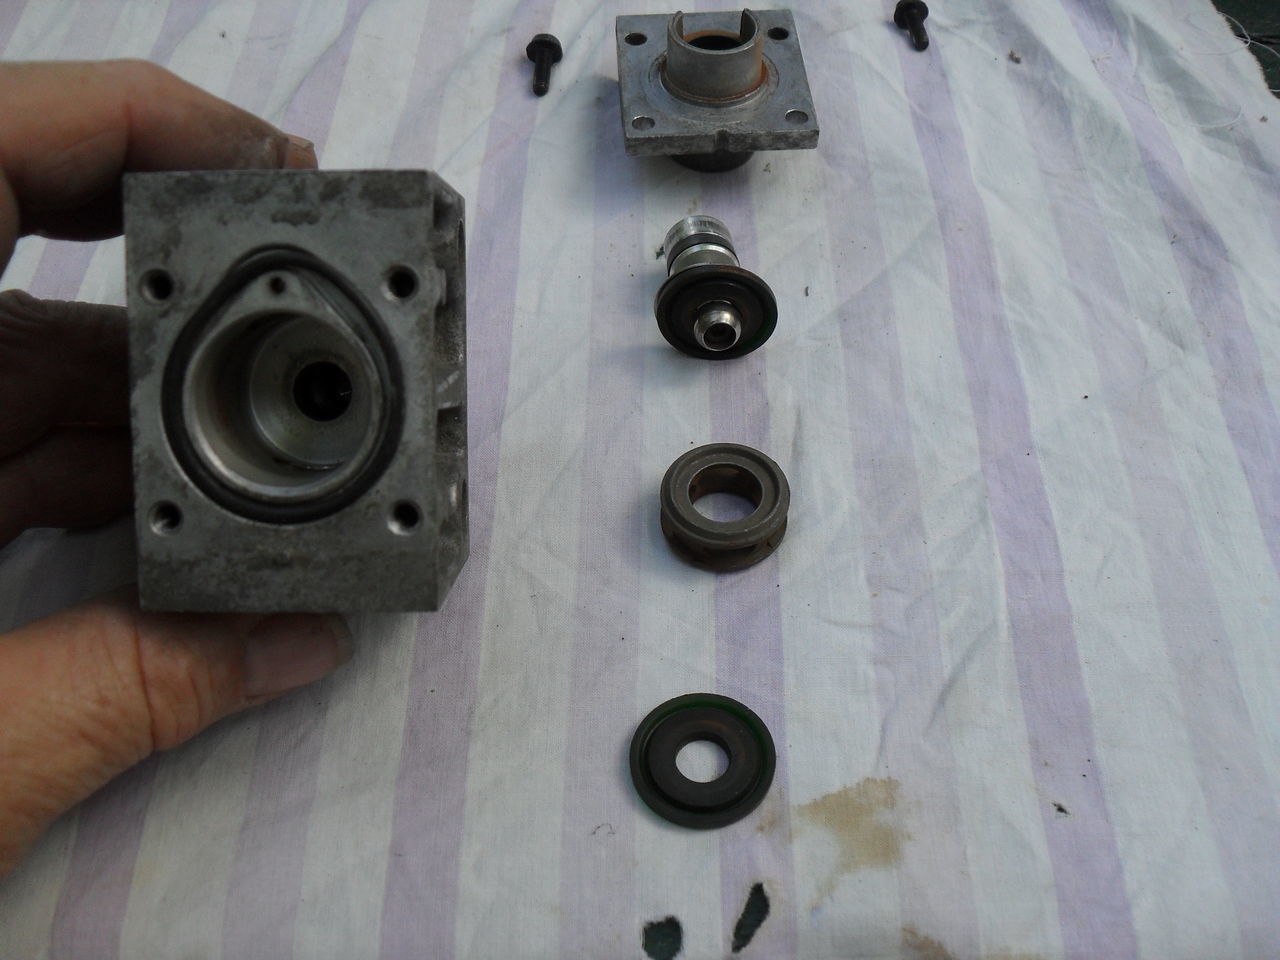
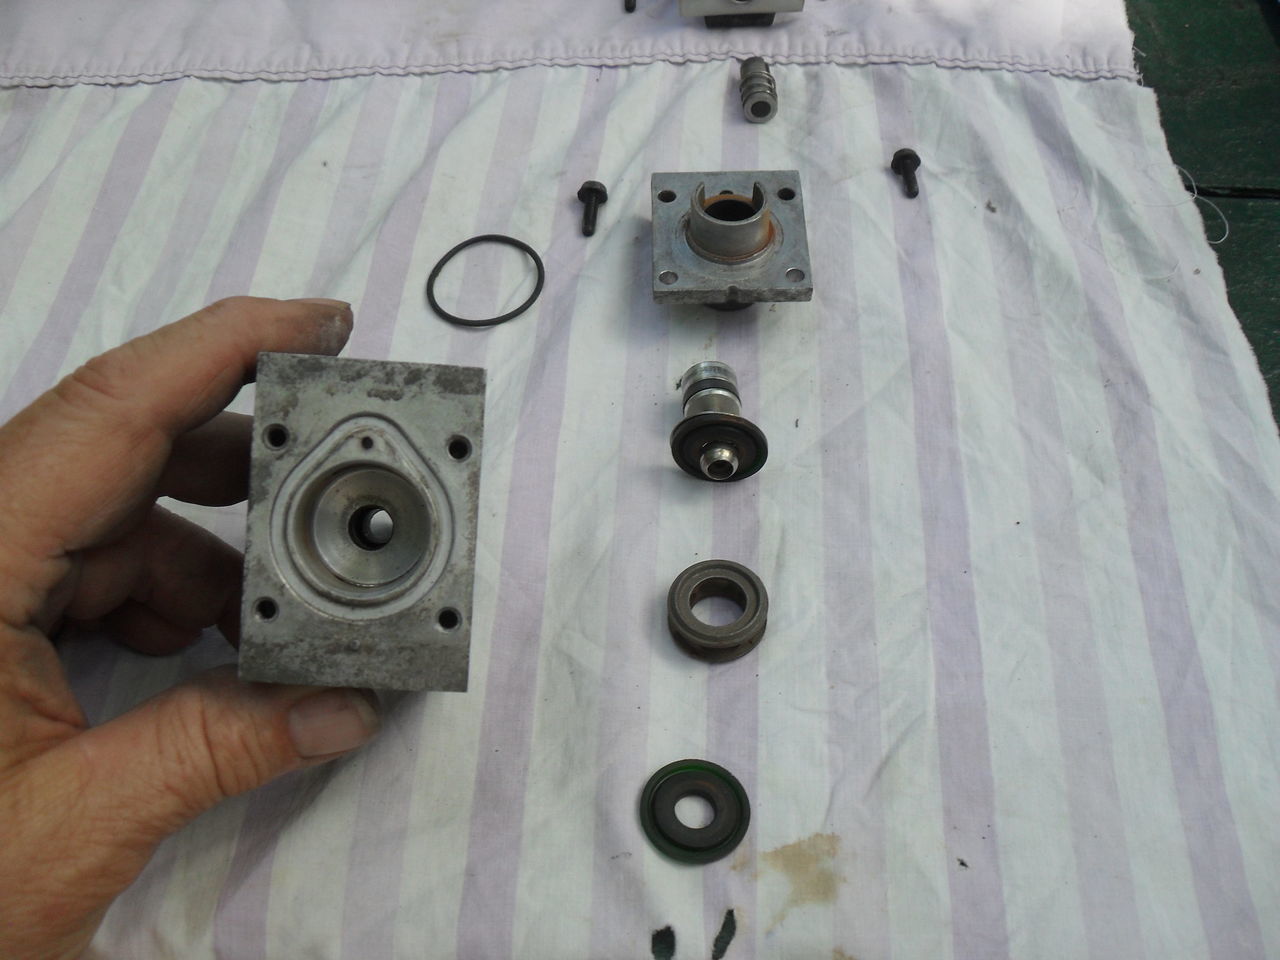
First you will have to unplugged the electric line and unhooked the air line then valve just unscrews off the accumulator tank. Now that you have the valve in your hand you will need to get a good clean work space. After cleaning the outside of the valve to get the biggest part of the dirt off you will need a 7mm socket and ratchet to start your disassembly. You will see 4 hex head screws 2 long ones that hold on the coil/pilot valve and the other 2 short ones hold just the piston cover. Loosen all 4 before removing the 2 coil screws. When you remove the 2 long screws the coil will come off along with the plunger and spring. The plunger and spring will come out of the coil and will just slide back in as there isn't a guide pin for the plunger. Set this to the side. The coil assembly will only go back in one direction so there is no need for a match mark.
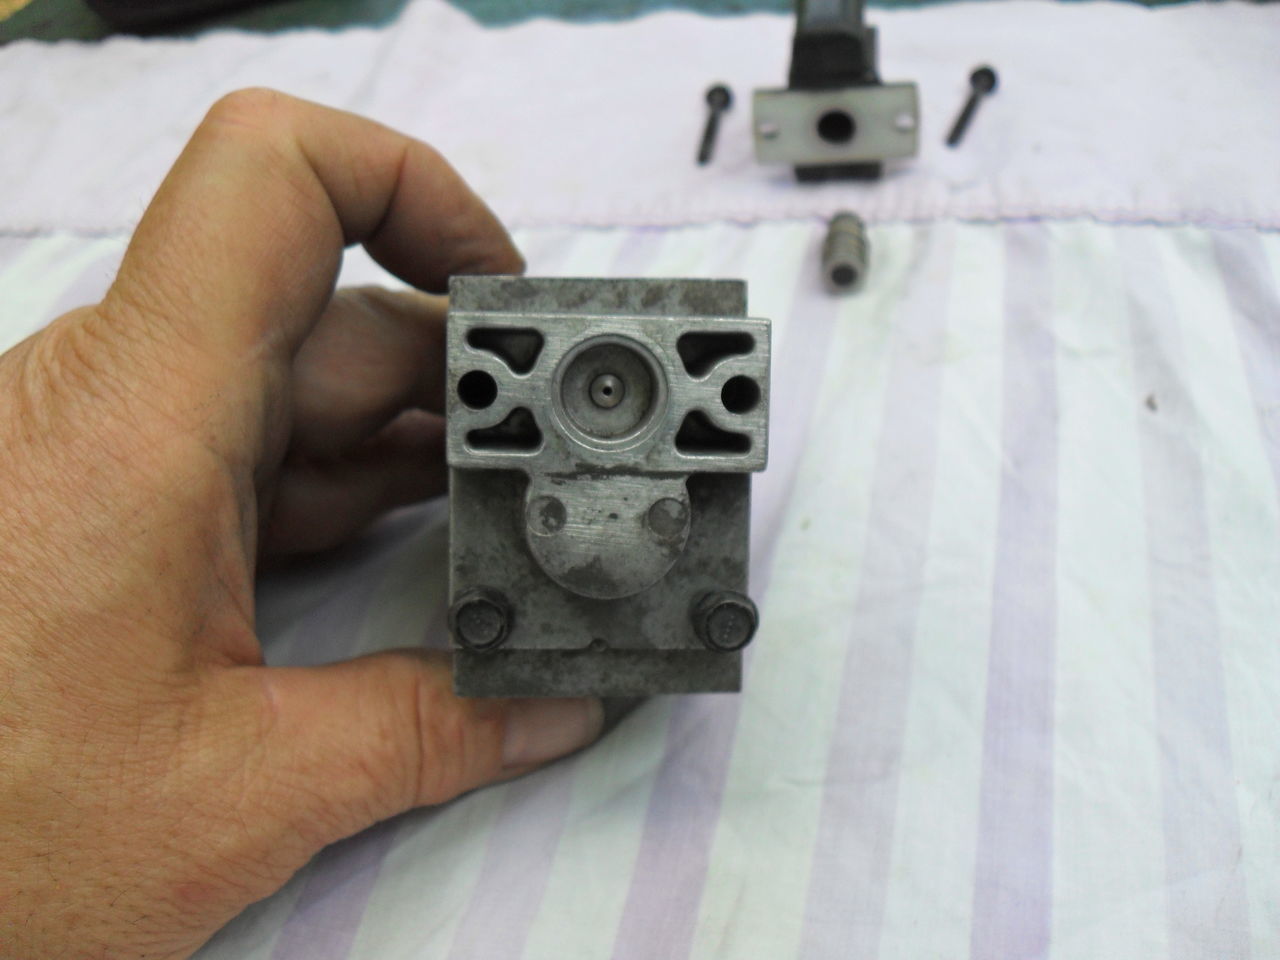
The main valve body cover is now held on by the other 2 screws. When you remove these there isn't a spring or anything that will go twang and fly out. After you take the screws out the top will come off by pulling straight up to clear the piston. You will set it to the side. It will only go back in one direction as there is a match pin that will have to be lined up when you put it back together so there is no need for a match mark. Now would be a good time to remove the “O” ring from the valve body and set it to the side.
After the top is removed the piston will be sticking out of the valve body. Just grab the piston and give it a tug. The piston, piston ring, connecting rod, stainless backing washer, and nylon seal washer will come out as a unit. This is when you will start to see dead bug parts. You will need to take a toothpick or used kitchen match and remove/clean out this loose stuff.
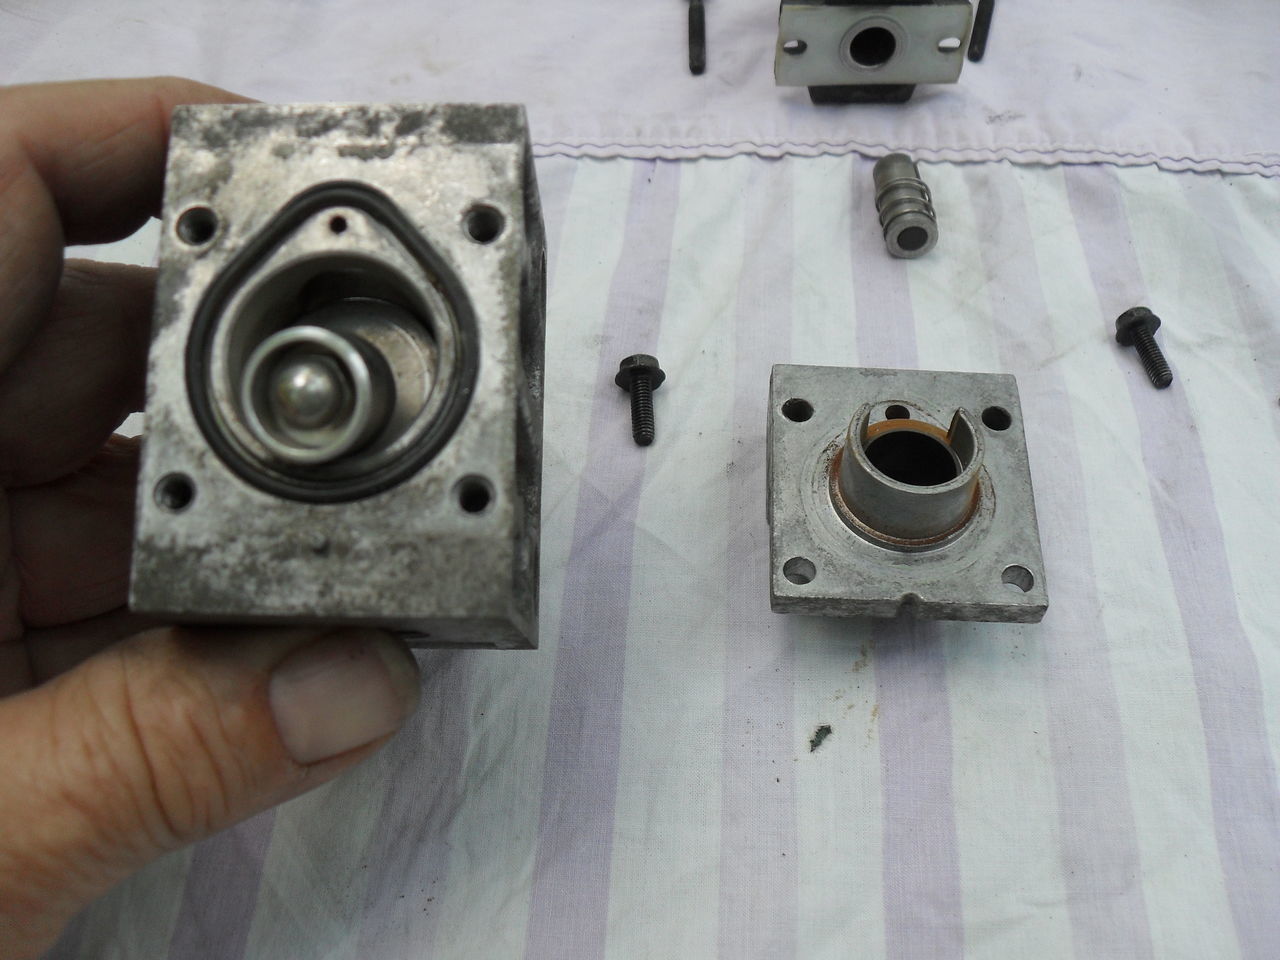
The main metal valve will now be exposed. It will just slide out. It is made symmetrical with 4 side holes and seat rings on each end. I like to keep the up side up and down side down so the seat rings will match with the seal washers that they have been sealing on. (both the one on the bottom of the piston assembly and the one that is hid below)
With the main valve out you can remove the bottom seal washer. You may have to take a small instrument screwdriver and go in through the air in port to gently lift/loosen and lift out this seal washer. When you get to this point you will need to clean everything you see. You don't need to disassemble the piston assembly to get it clean. I like to use contact cleaner for the cleaning but use what you like. Just don't use something like a wire brush or pocket knife as you don't want to scratch any of these parts because scratches cause air leaks. We are trying to save you a $ or 2 not spend a couple of hundred.
When everything is clean all you have to do is reassemble the parts in reverse as to how they came out. This is a good reason to have a good work space so all the parts can be laid out in order as to how you took them out. If you use any lube during reassembly use dry silicone as anything any thicker will gum up the works. The “O” ring that goes between the body and top will need some lube. I use a small amount of Dow Corning 111, the less you can use the better. Here is a series of pics of what I am talking about and the parts you will be seeing.