Foretravel Bulkhead Repair-- A Comprehensive Look
This is on a 1993 U240, but applies to Unibody and Unicoaches.
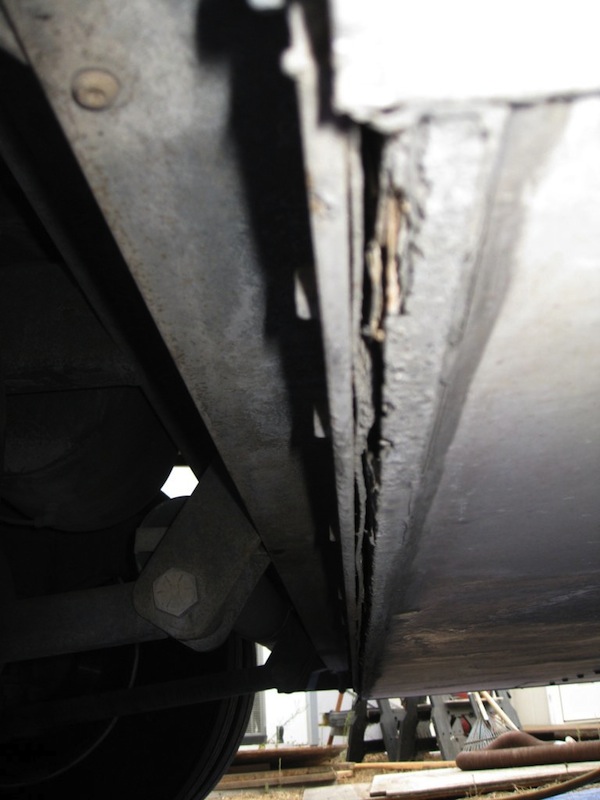
I am not sure bulkhead is a descriptive term here. The center part of the coach is built on a strong grid system with 1 1/2“ box beams with 1/8” walls at the ends (front and rear) where they attach to the 1/4“ angle that is part of the frame holding the drive train (rear) and front end (front).
 From the factory, the two “areas” were attached using 5/16” Roloks: (Brochure)
The Rolok's go through the ¼“ angle and torque into 1 1/2” box w 1/8“ walls.
After talking with Mark Harvey at Foretravel and an engineer at Rolok, I went under the coach. First, I looked for any separation in the area of attachment. NONE– just some light superficial rust.
Next, I put a torque wrench on each of the Roloks. Check torque to 250 INCH (repeat INCH) pounds. Check torque CW and CCW. If they don't hold you need to know that. If it loosens, use that hole (drilled to 3/8”) to install a thru-bolt.
What I found was that 5 Rolok bolt “heads with 4 threads” pulled out IMMEDIATELY–at less than 20 inch-lbs. All the rest did not move at 250. In inspecting the failed Roloks, all had been broken for a long time – light surface rust on the sheared surface. The “4 threads” mean they were broken where they started torquing into the 1 1/2“ beam. Could have been broken at installation or from sheer stress afterwards – not sure it matters.
Two fixes: Either remove the broken bolt (soak with penetrating oil, double nut and back out from the INSIDE), drill to 3/8” and thru bolt OR drill a new 3/8“ hole and install 3/8”X 3“, Grade 8 bolts and nuts on either side of the “failed” Roloks. Yes, you can use shorter ones, but the 3” ones made the job a little easier. Because I wanted to be able to torque the thru-bolts to 275 in-lbs without taking any chance of crushing the box beam, I made some 1 3/8“ X 1 3/8”1/8“ plates to install next to the beam (cost me a piece of steel and $10 at a machine shop). So on the rear, from the rear: the 3/8” bolt, washer, 1/4“ angle, 1 1/2” bulkhead, 1 3/8X 1 3/8X 1/8“ plate, washer and pinch nut. All hardware grade 8 (except plate). Torque 275 in-lbs (again that's INCH not FOOT).
I used good quality Cobalt bits, progressing up one bit size at a time, using plenty of cutting oil and keeping the bit cool. Then, to access the “inside” to install the plate, washer and nut, I used a 1 3/8” hole saw to cut through the very thin fiberglass bottom of the coach. Hole was centered on the bolt left to right and the closest edge of the hole was approximately 3/4“ in from the inboard edge of 1 1/2” beam. This allows access with a screwdriver to easily remove the foam core, exposing the beam and also access for the 9/16“ wrench to tighten the nut. When locating the thru-bolts, use a magnet to locate the other beams in the fiberglass “floor” to the basement. Since you need access to install the plate, washer and nut, obviously, avoid areas with beams in the floor.
I wanted a water-proof plug– driving through rain could “challenge” plugs not designed to keep water out unless sealant, etc was used. The largest I could find was the 1 3/8” Heyco plug PN 3837 (heyco.com/products/sec_02/2-09.html). This really gave plenty of access.
The other suggestion is that, at least on the coaches I have seen, there is nothing keeping water from migrating in past the head and threads of the Roloks– i.e. the 1/4“ beam is drilled larger, so the Rolok threads will torque in the 1 1/2” beam. That leaves room for water to migrate in along the side of the Rolok where it goes through the 1/4“ beam. I filled the holes where the broken bolts were with bondo. Then wire brushed the beam and short metal “skirt” just inboard of it. Then put masking tape on the head of the Roloks (where a socket would fit) and use automotive undercoating to seal the area, making sure the Rolok to beam joint is protected.
I suggest that this is ROUTINE PREVENTIVE MAINTENANCE AND THE ROLOKS NEED TO BE CHECKED ANNUALLY.