Replacing transmission retarder valve
If the problem you are experiencing with your retarder valve is air leaking, be sure to try Repairing / Cleaning the Retarder Valve first.
Allison Part #29552377 (this replaces earlier part #29547934)
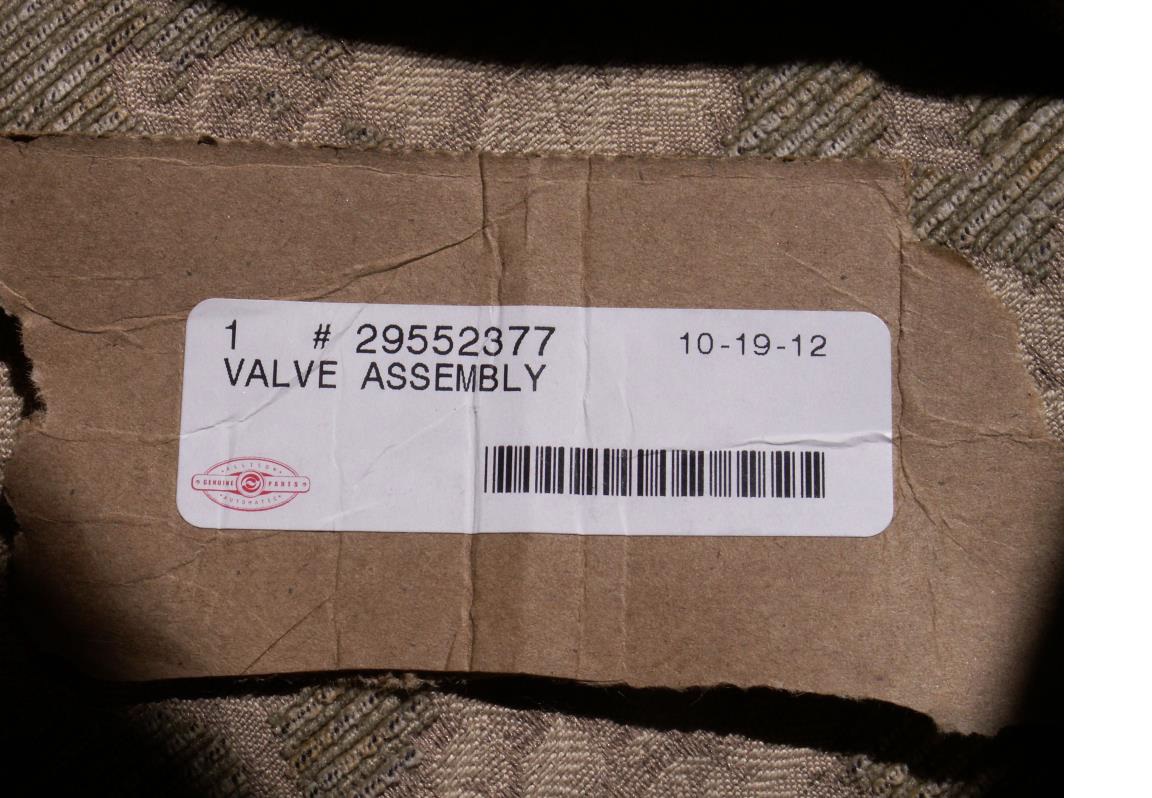
The Foretravel shop reported our retarder valve assembly was leaking quite a lot air. We decided not to replace it due to cost and advice from Alton that it probably was not necessary. The part, which they had in stock, was $500.03.
Later, we found 3 of these available on eBay. Buy it Now for $169.00 or Make Offer. Got one for $130 plus $6.85 shipping. Prior to removal of the old one I raised the coach and let it settle on supports between the frame and axles. Then bled air out of all tanks.
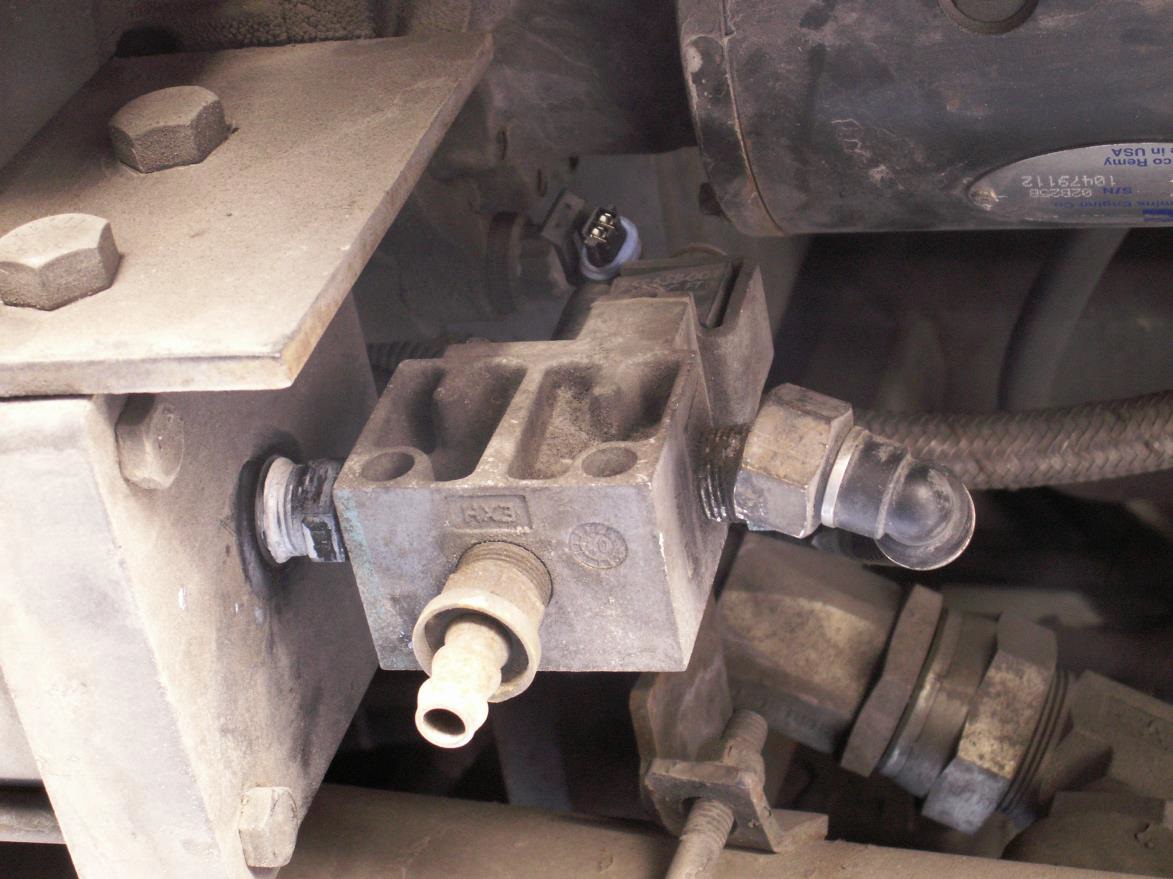
Removal is pretty easy; disconnect air supply line and the electrical connector.
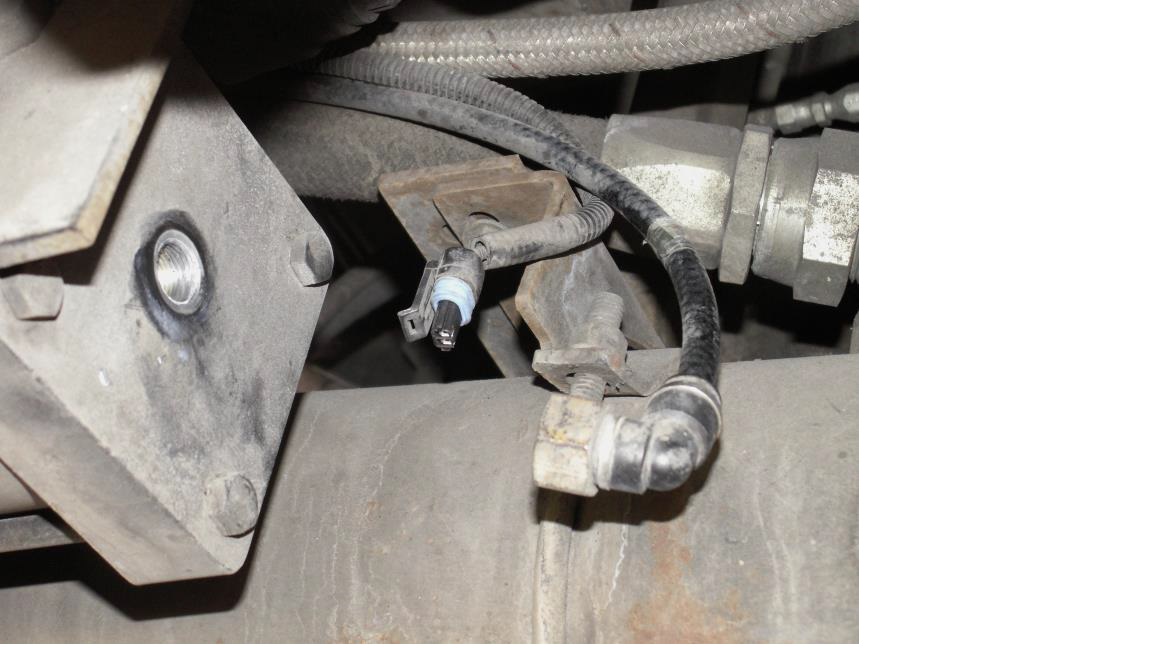
Then remove valve from retarder accumulator.
Hardest part was cleaning old pipe compound from hardware threads.
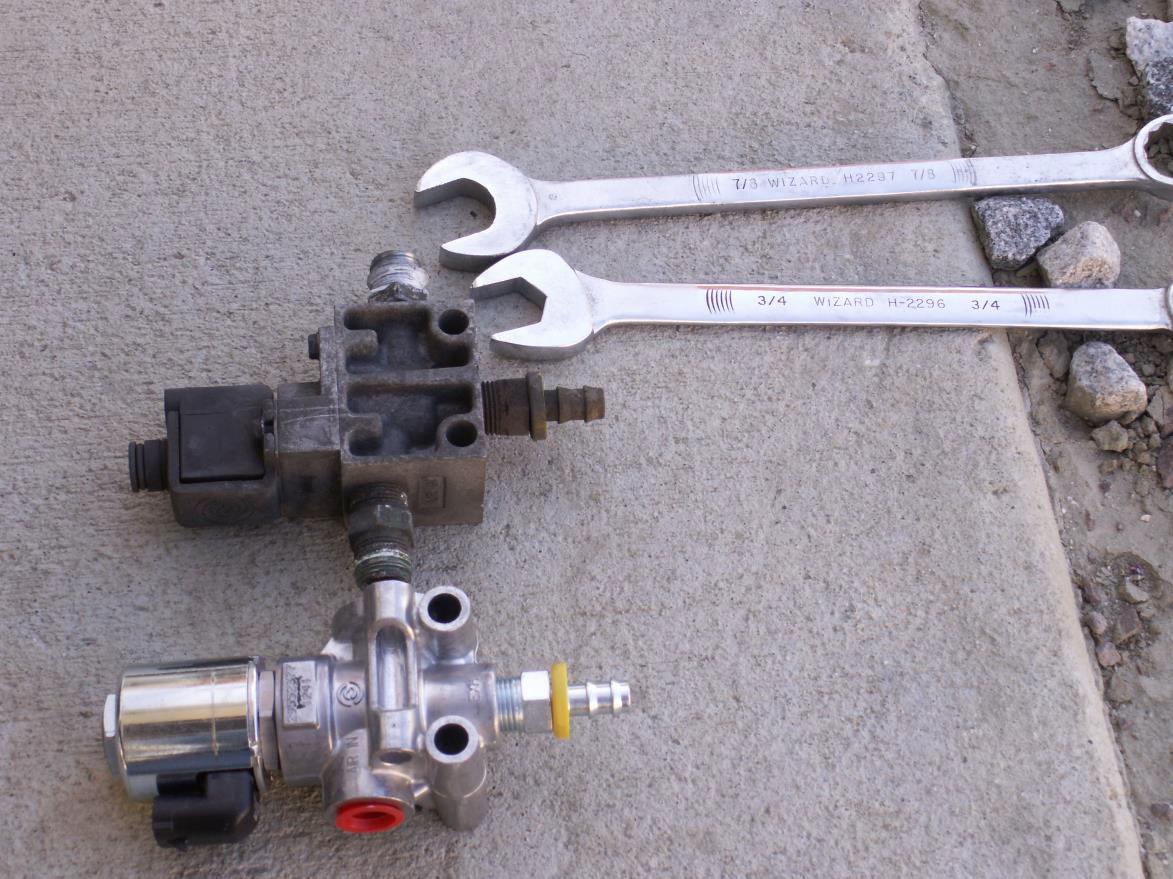
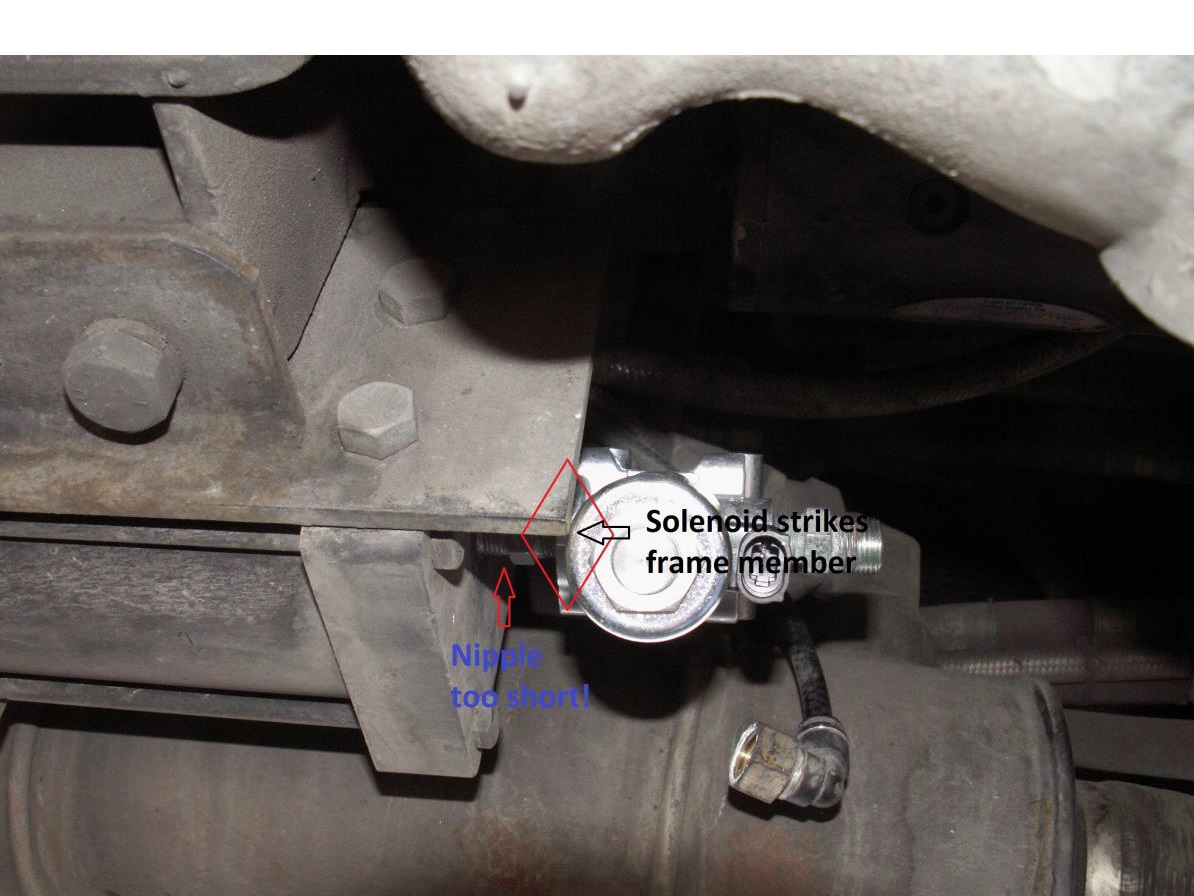
The solenoid on the new assembly is a little wider than on the old one Part #29522717. As a result, reusing the old nipple did not work. I had to get something longer. Found a 3/8” x 2” nipple at the local auto parts store, which worked fine.
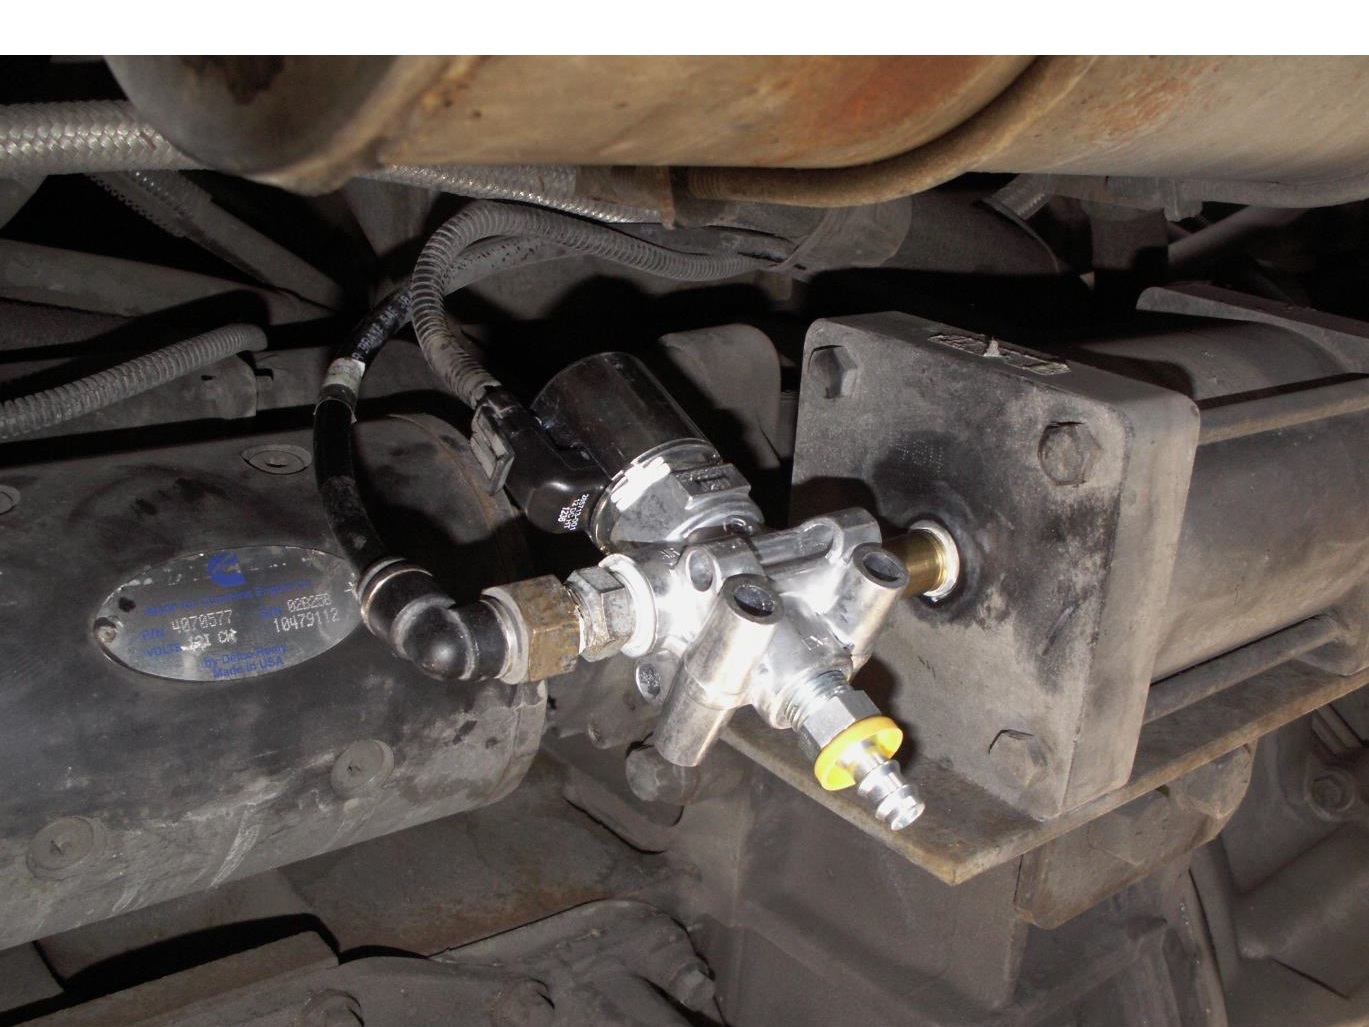
I used a TFE thread sealer. Tested for leaks with soapy solution; none found.
Now we just have to confirm normal operation of the retarder on our next trip in a couple weeks.
Alternative Removal Method
The only difference for me from what was posted above is that I could not remove the old valve as it hit our transmission cooler when you tried to unscrew it.
I opted to remove 3 of the 4 bolts that held the accumulator to its bracket and just loosen the 4th one. This allowed the accumulator assembly to rotate down (once you unplugged the wire and air line).
With the accumulator valve rotated I had all the clearance I needed and it allowed me to use all of the existing hardware with the new valve. Tighten all the fittings, rotate the accumulator back up and tighten the bracket bolts.