Replacing Your Holding Tank Valves
- The gray and black tanks must be emptied, flushed and emptied again.
- Level the coach dump side high so anything left over in the tanks stays there.

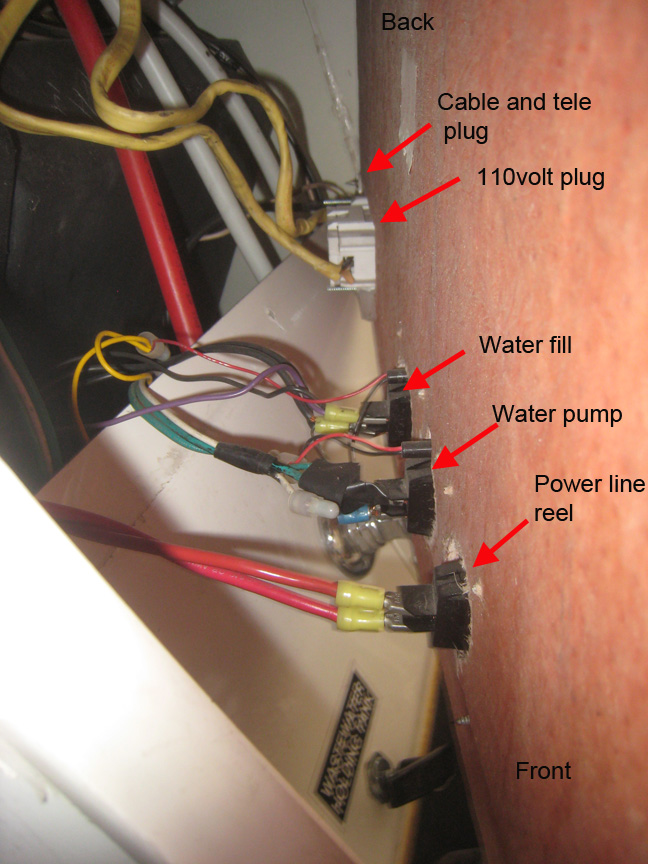
Remove top panel (three screws). This panel has three switches (at least on a 2003 coach) plus a 110v plug, and a plug for cable TV and a phone line. The switch wires are easy to remove and the rest can be removed without a lot of effort. To get this panel out you may need to remove the faucet spout and the hot water handle. The panel can pivot at the right back corner. Pull the left corner out and then once the faucet is cleared, it can be removed.

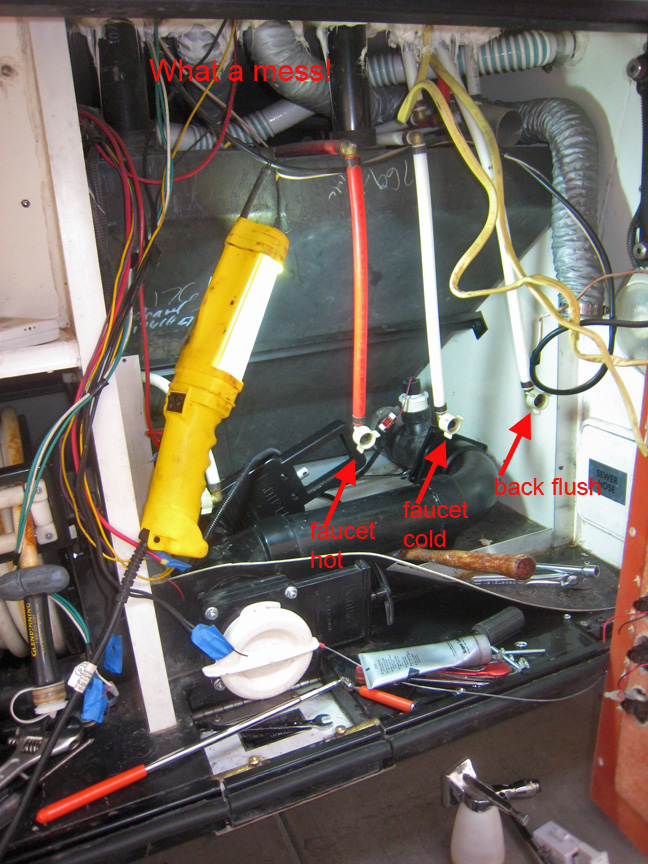
Remove the bottom panel (four screws on the bottom). It also has connections to the faucet and the black tank flush. Once everything is disconnected, the panel can be pulled up and removed. The area around the sewer outlet is rubber with a split on the bottom. This panel is a pain to take out, but you can not reach the rear bolts on the valves without taking it out.

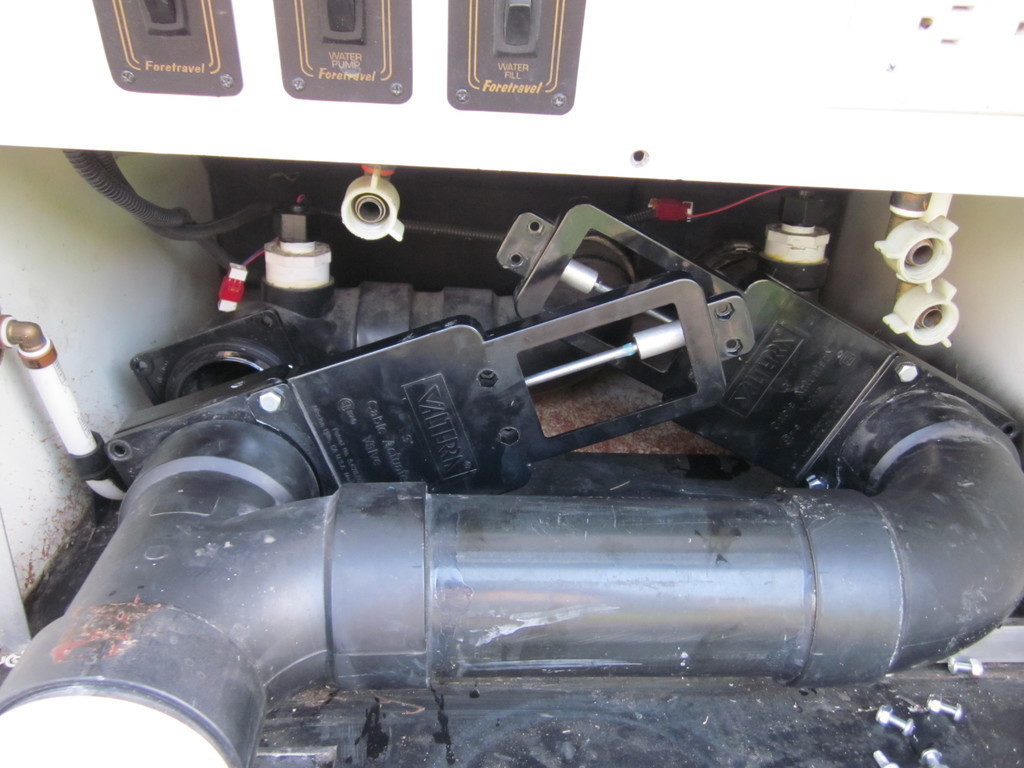
Once the panels are removed, the valves can be accessed. The dump valves are secured in place with 4 bolts (11mm socket). The pull cable “holder” also has an additional 4 screws each to remove. Once all the bolts are removed, the front piping assembly comes right off.
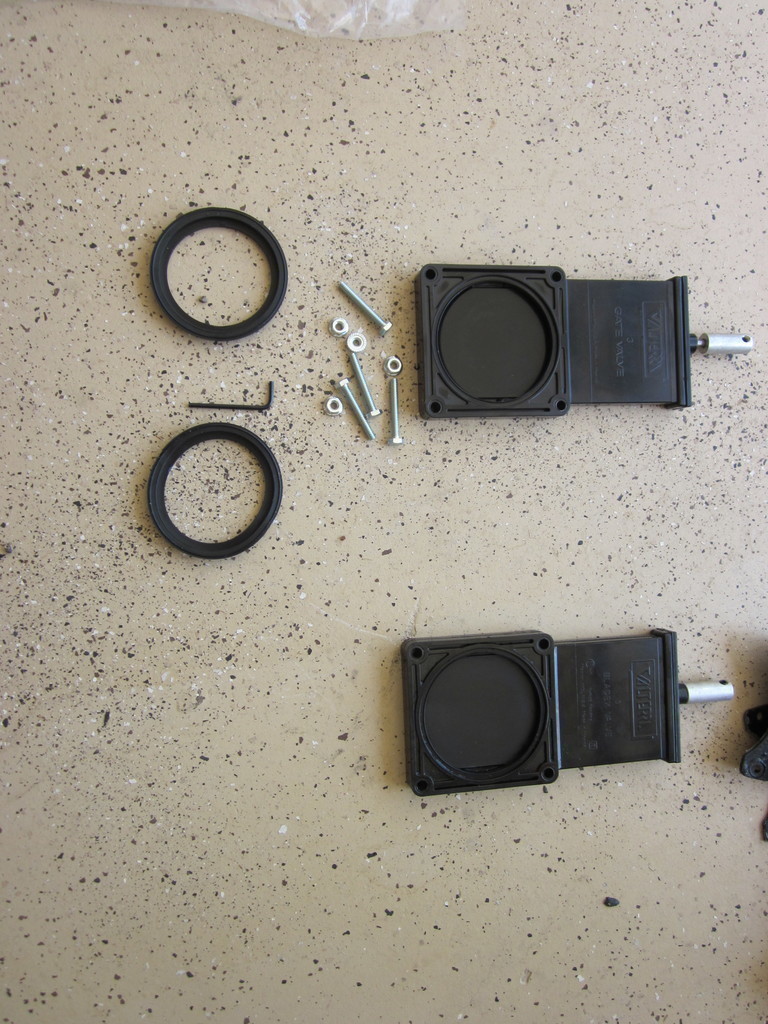
- Pull off all the old gaskets and dispose of them along with the old valve bodies.
- Clean the gasket surfaces as needed, and set the new gaskets in place, they fit over the flanges so they stay in place.
- Lube the face of the gaskets (the section that will contact the valve body) with silicon grease (plumbing department of any box store). Will make them SMOOOOOOTH for a long time.

Reverse the valve disassemble process. One important note is that bolts that go through the full stack of flange + cable pull holder are longer bolts. What you get in the replacement package will not work for those 4 locations, so you have to reuse what you have or buy new.
- Since the pull cables are out, loaded them up with a waterproof cable grease to keep them running smooth for a long time.